In this Animal Skins Art Lesson, Middle School students will love the magic of this resist project that demonstrates line and texture found in animal skins. This project covers Common Core Standards for Math and Science for grades 7 and 8 which can be found at the end of the lesson.
Grade Level
5th, 6th, 7th, 8th Grade – The examples in this lesson are made by 6th graders
Objective
In this Animal Skins Art Lesson, students will design a textured animal “skin,” and include the silhouette of the animal.
Time
3 – 60 min lessons
Materials
- Pencils
- Oil pastels – Pentel Arts Oil Pastels, 50 Color Set (PHN-50)
- 9×12 Watercolor paper – Canson (100510941) XL Series Watercolor Pad, 9″ x 12″, Fold-Over Cover, 30 Sheets
- Brushes – Acrylic Paint Brush Set, 1 Packs / 10 pcs Nylon Hair Brushes for All Purpose Oil Watercolor Painting Artist Professional Kits
- Liquid Water Colors – Sargent Art 22-6010 10-Count 8-Ounce Watercolor Magic Set
- Or this mini version for homeschooling – Sargent Art 22-6210 10-Count 4-Ounce Watercolor Magic
- Black Construction Paper – SunWorks Heavyweight Construction Paper, 9 x 12 Inches, Black, 100 Sheets
- Scissors
- Glue Stick – Elmer’s Glue Stick (E4062) (7 sticks)
Instruction with Questions
I got the idea for this project from this site.
Pre-Art
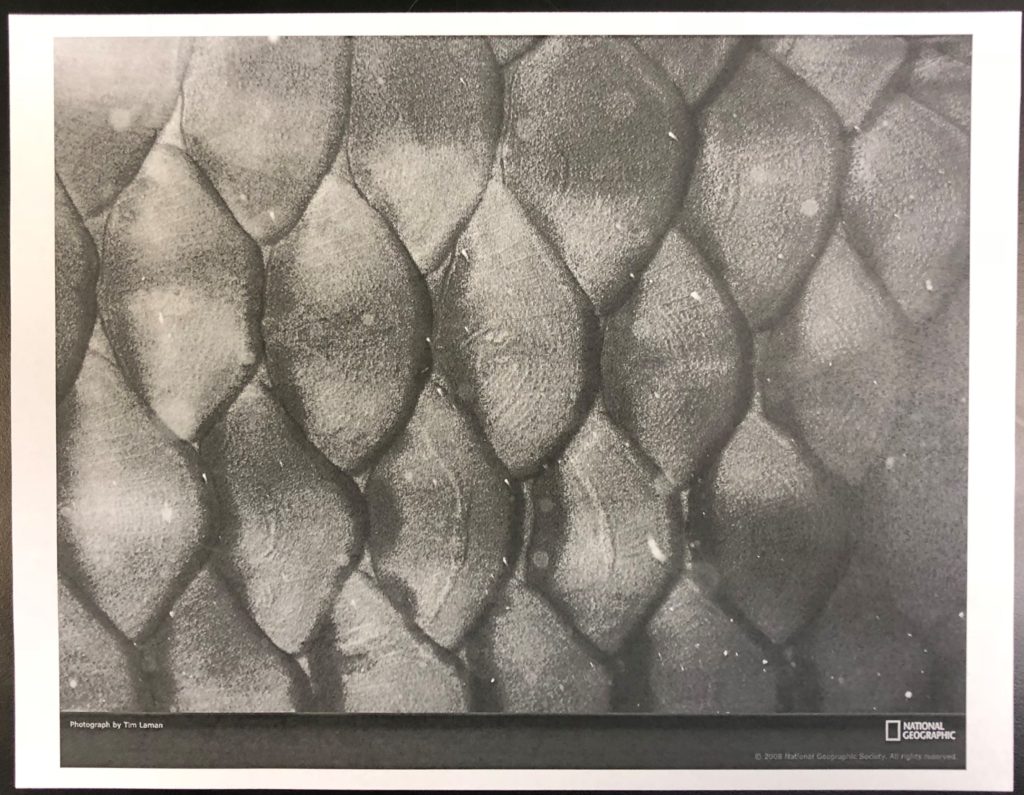
Print out images from the power point presentation. Students will choose from these images to re-create the texture of an animal’s skin.
Day 1
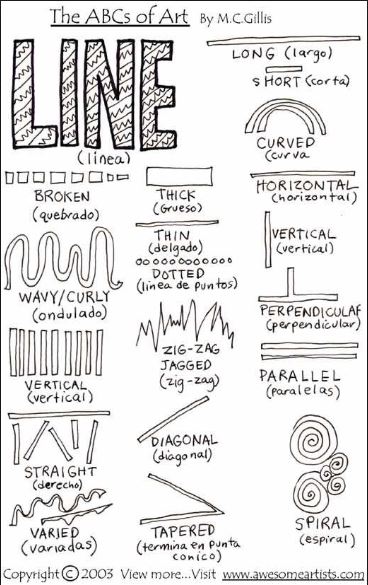
Review types of line elements. I highly recommend this site for great posters and handouts and it is all free! It is called Awesome Artists so who can argue with that? 🙂
Show them the images in this lesson on Texture vs. Background
Next, students watch a Power Point presentation and try to identify the animal skin that goes with each animal.
- What makes it look like feathers? Soft? Bumpy? etc.?
- Which parts represent the texture and which parts show behind the texture
Pull sticks and allow students to browse through and choose which animal skin they would like to re-create from printed images.
Next, demonstrate a preview of the technique “copy, trace, transfer” using tracing paper.
I literally do a quick demonstration for them. I pull sticks, and they come up, one by one, and choose from the variety of printed out animal skins.
Students practice copy, trace, transfer with their chosen/assigned eye on plain copy paper. This part is just to help them become comfortable with this technique.
Day 2
Students analyze and practice their textured animal “skin.” They observe the qualities that are unique to their assigned animal. I highly recommend that the students use this day as a practice day for their copy, trace, transfer technique.
#1
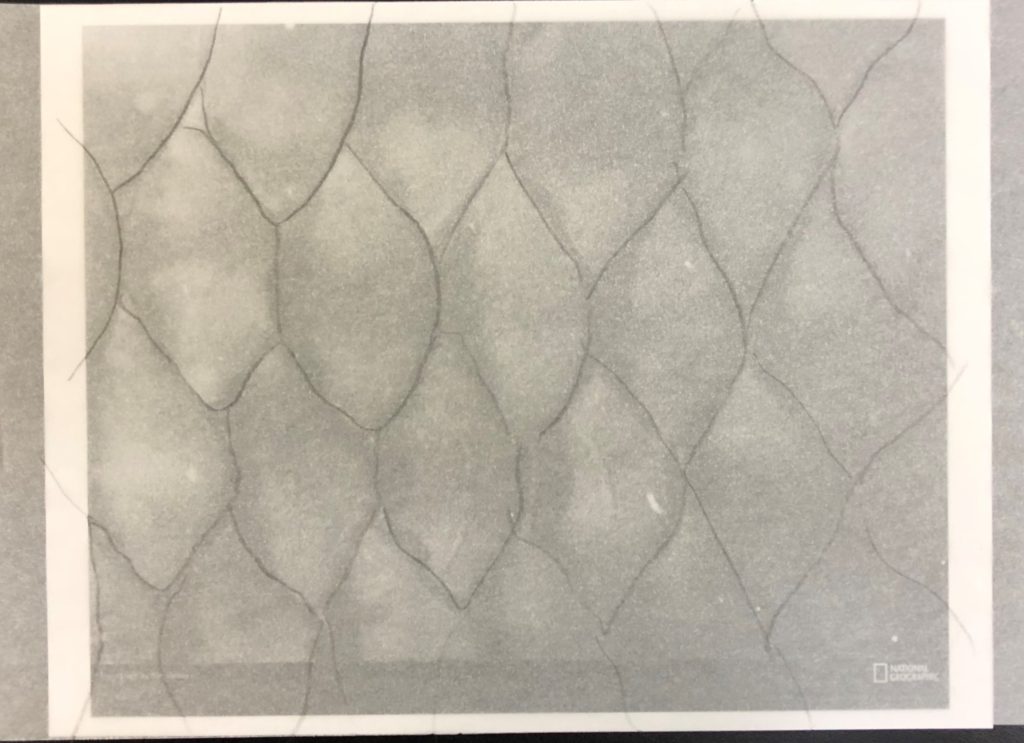
Students place tracing paper over their image and trace over main lines they discover.
#2
Students place the tracing paper – facing the lead to the watercolor paper. Re-trace all of the lines. You are essentially pressing the pencil into the paper on the other side that was facing the paper. There will be pencil on both sides of the tracing paper.
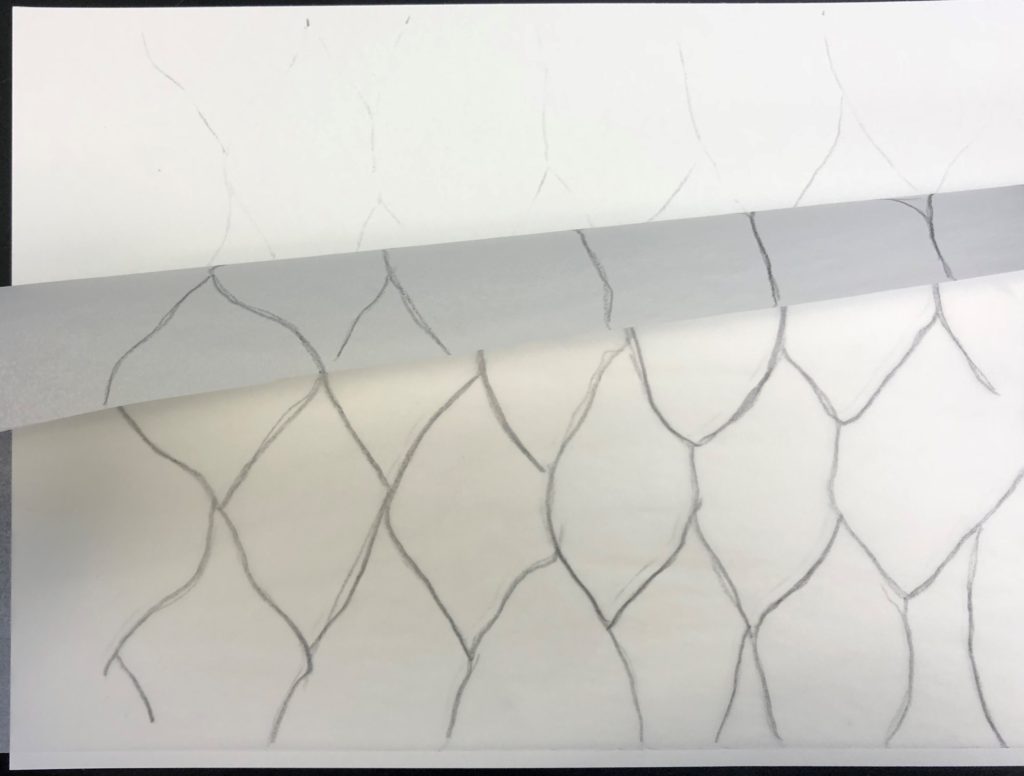
#3
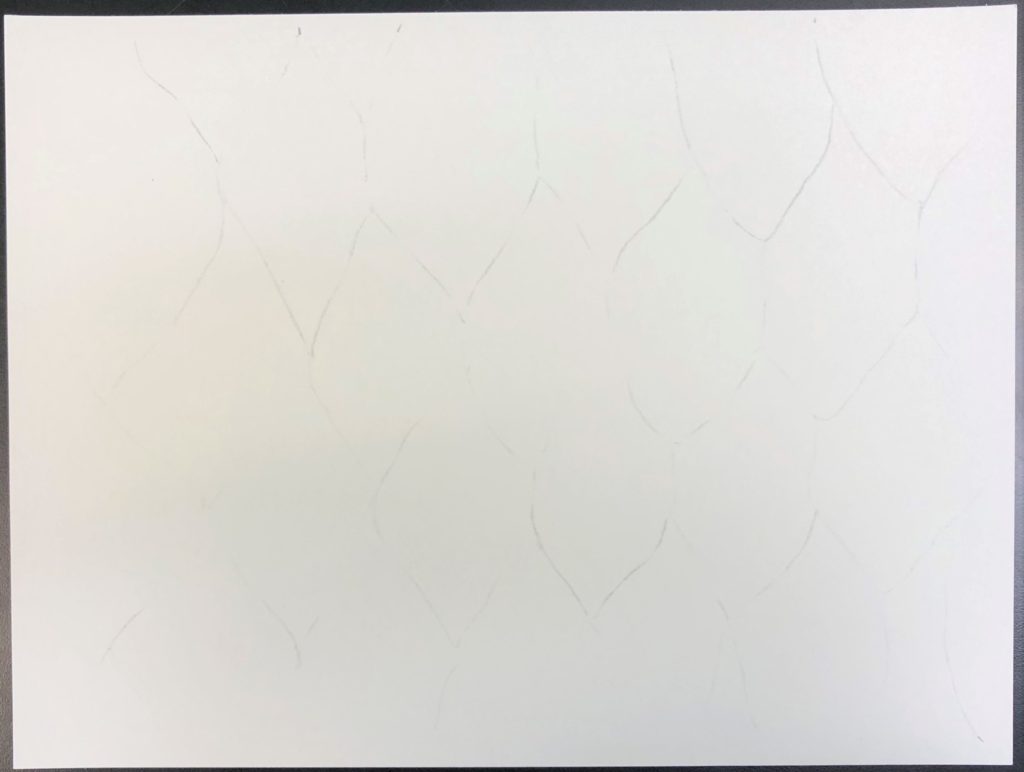
The paper will now look somewhat like this image below. Faint lines will appear to help guide the remainder of the project.
#4
Students review use of oil pastels
- rubbing vs. hard lines
- Tissue protection
- Resist with watercolor
Finally, students identify which parts will be created with oil pastel, and which parts will be watercolored. in.
Day 3
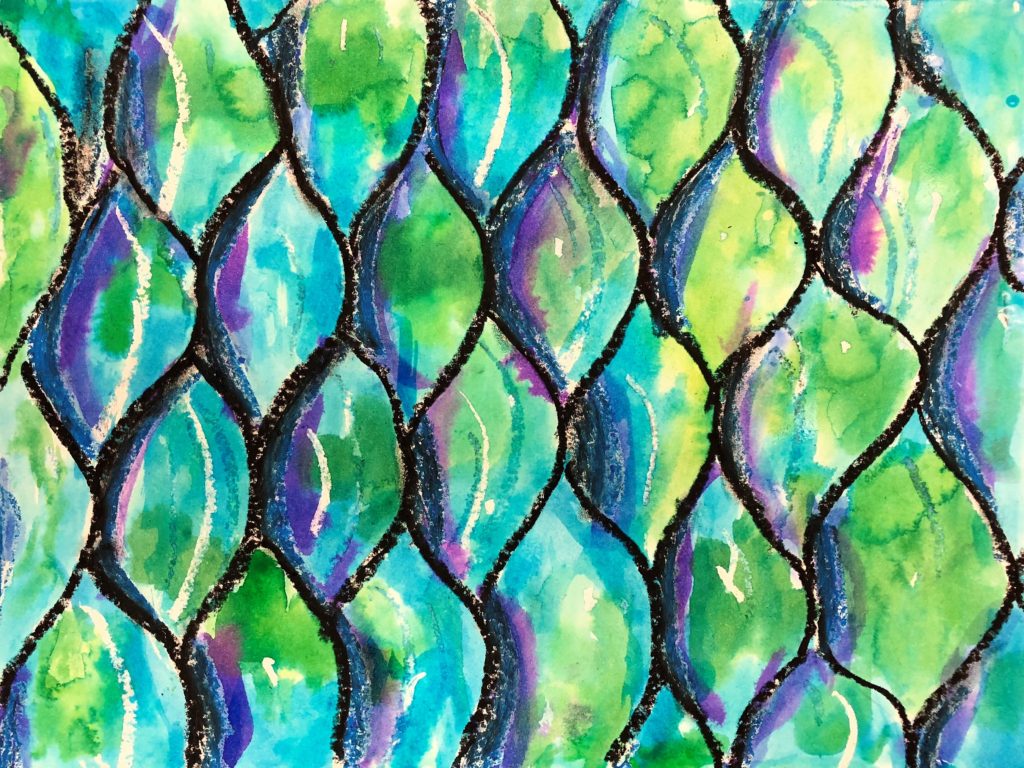
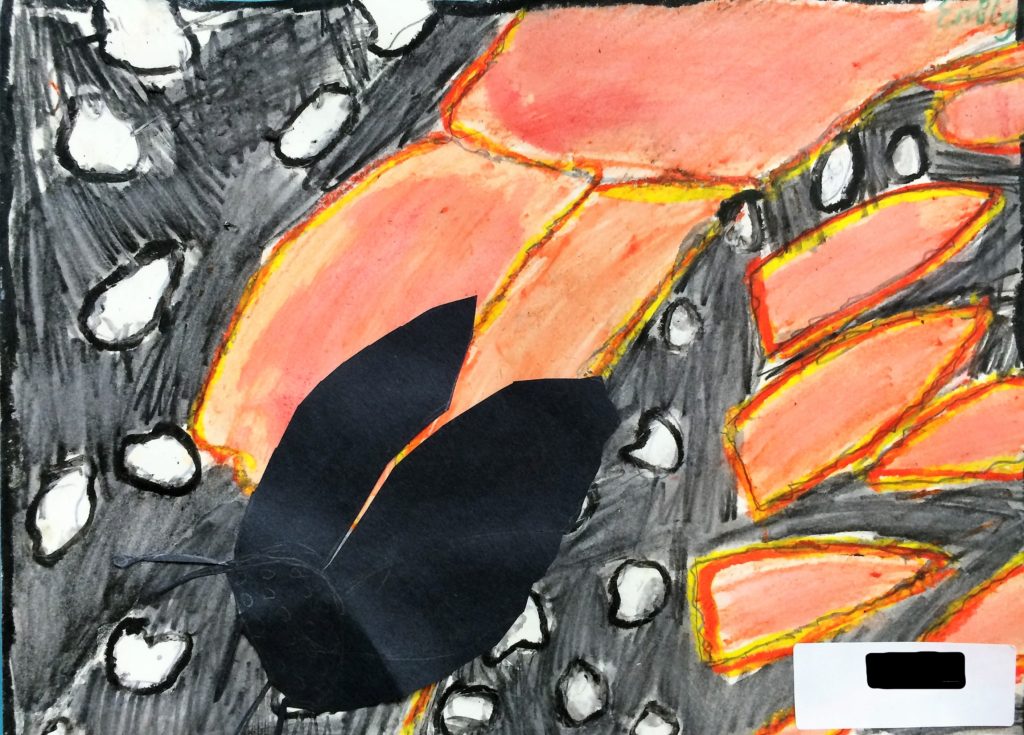
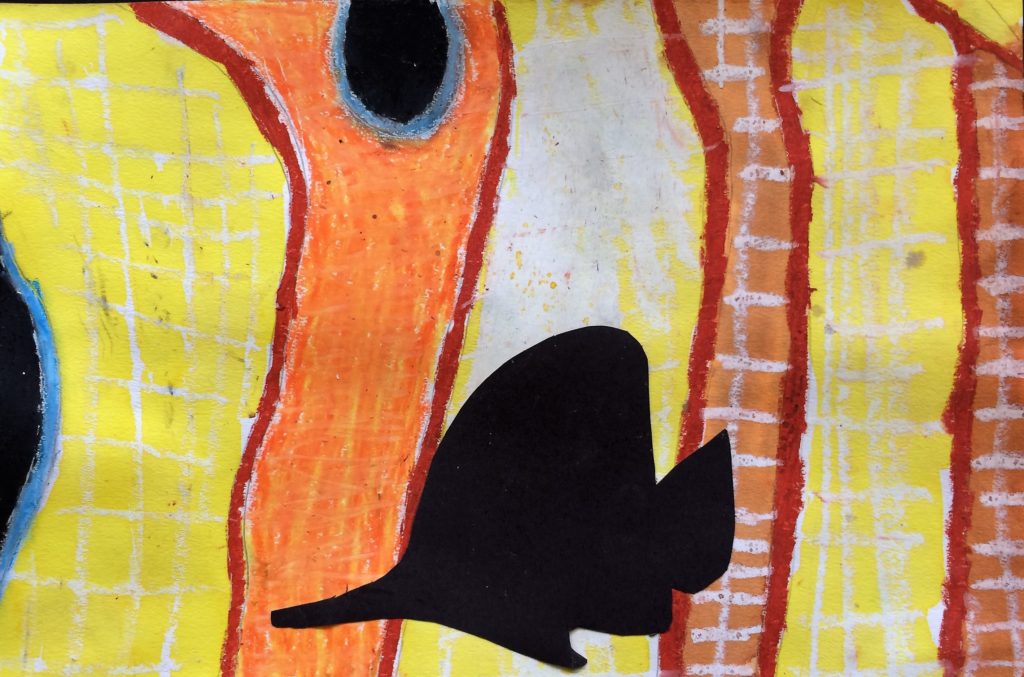
Students create their final version. The goal is to create the texture with the oil pastel, and the background with the watercolor paints. Students are reminded to identify and show multiple colors in the design.
#1 Outline the lines with the oil pastel. Remind students to use more than one color. Consider using a rubbing technique where needed for added texture.
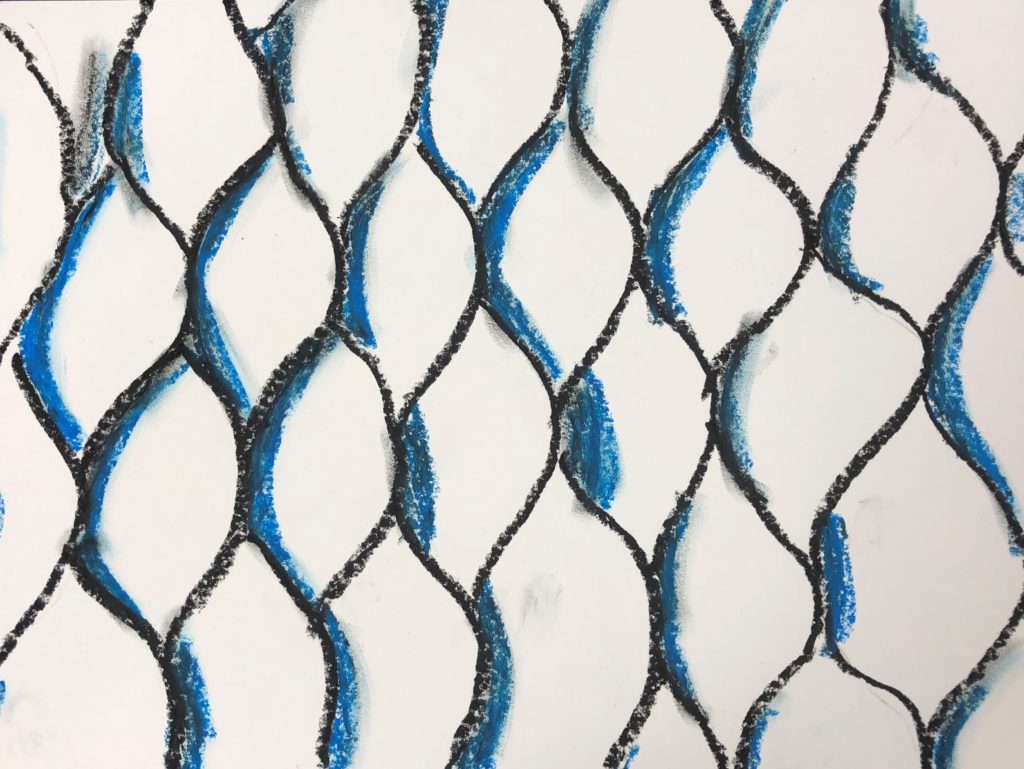
#2 Continue adding lines with color. Use white where needed. This will really help the image pop!
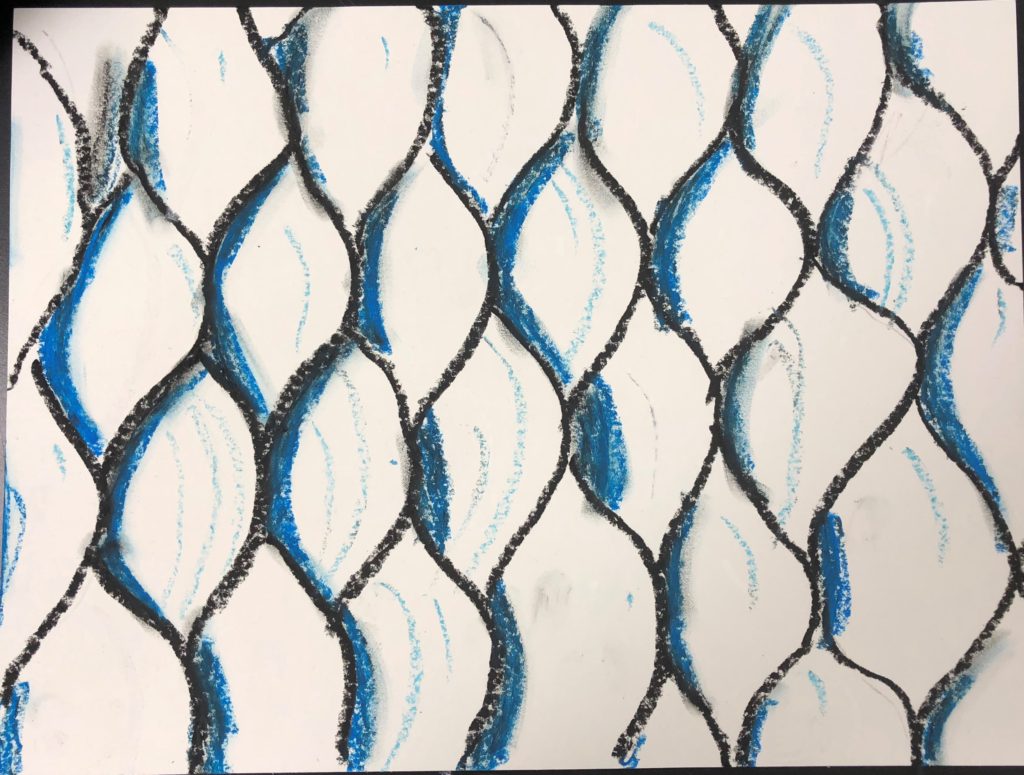
#3 Add a variety of colors using the liquid watercolors. Check out those white lines!
#4 While their image dries, students trace and cut out a silhouette of their animal to add to their piece.
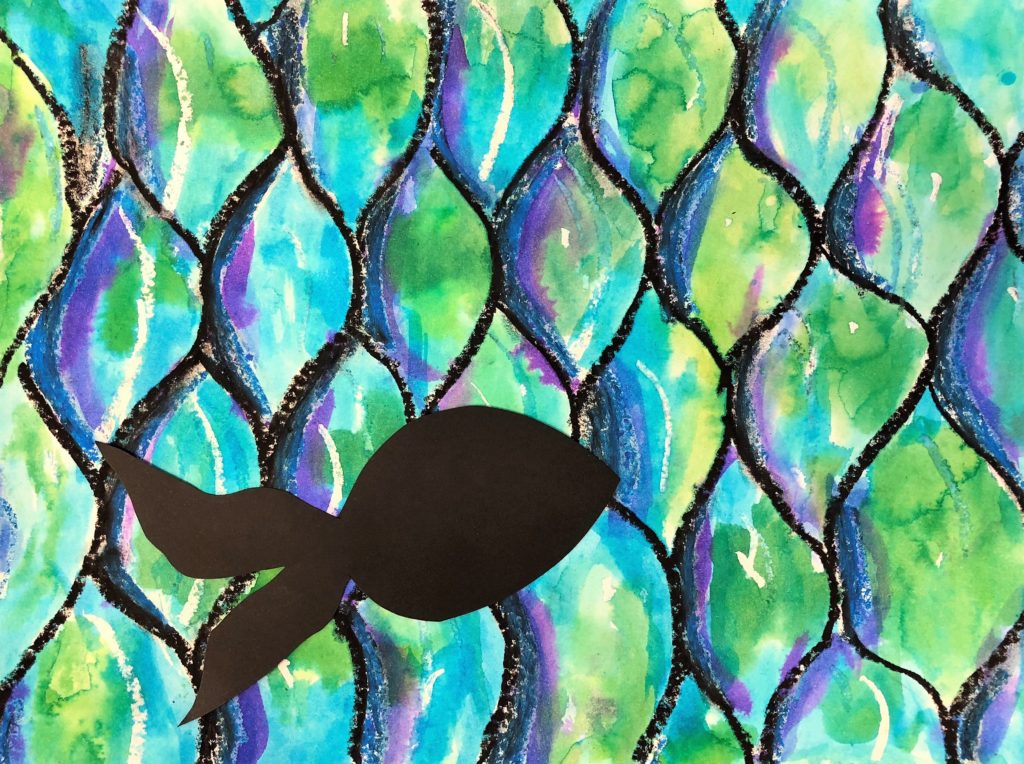
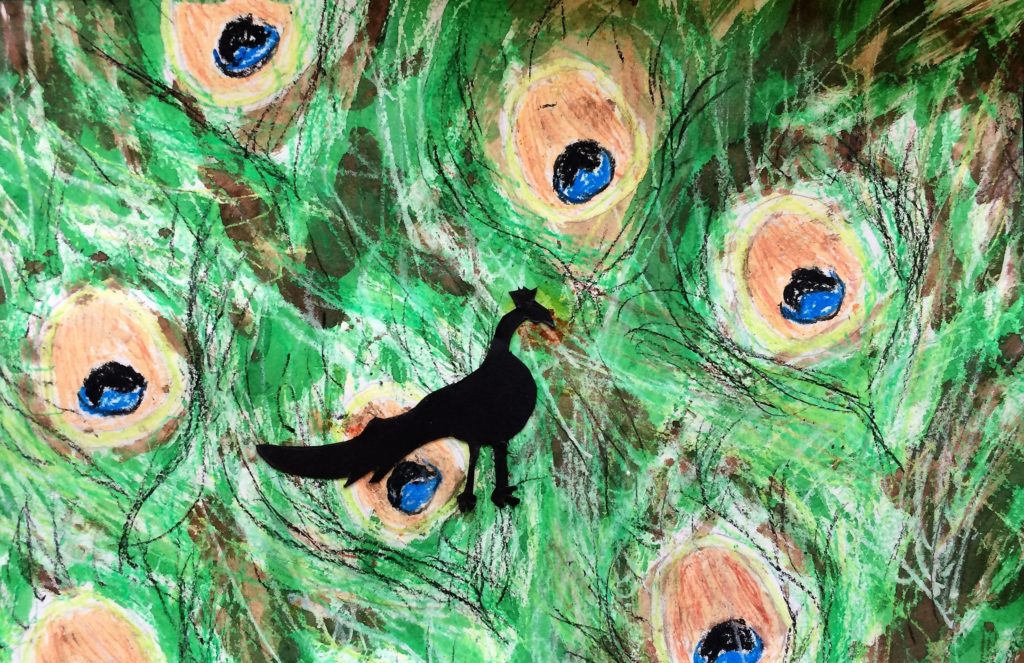
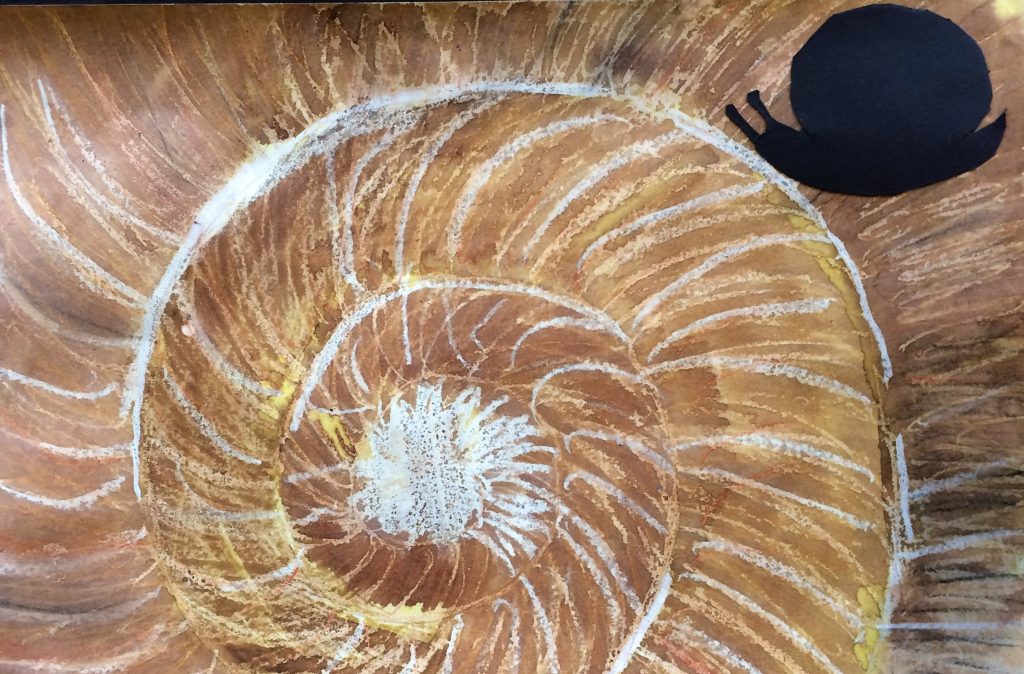
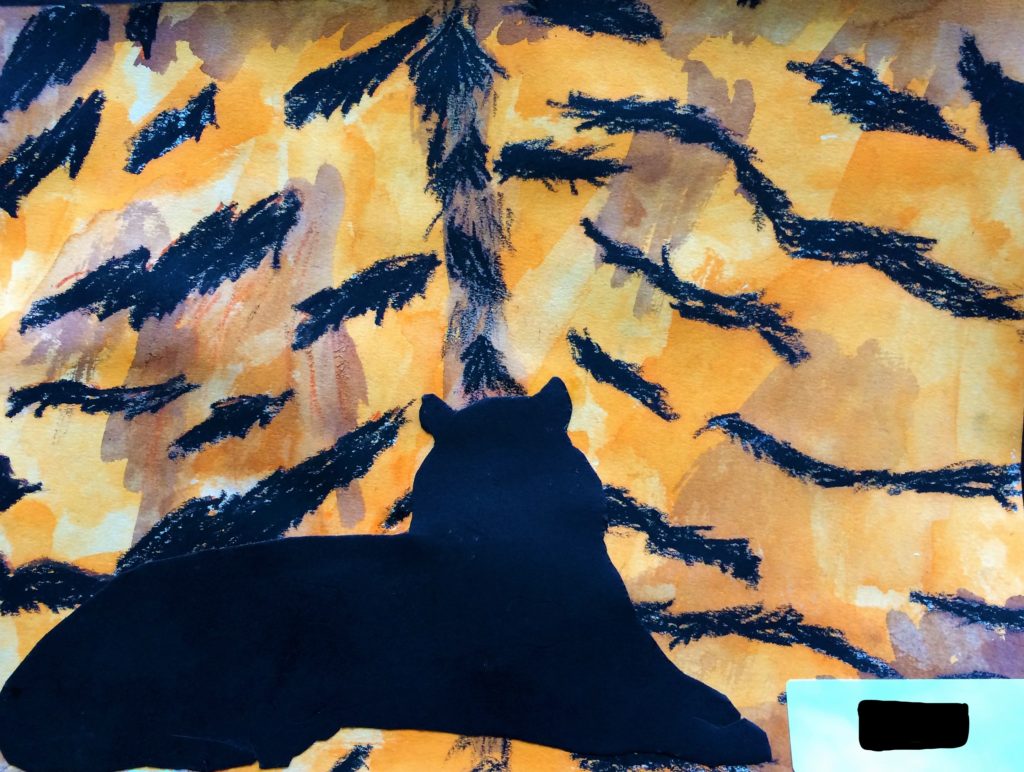
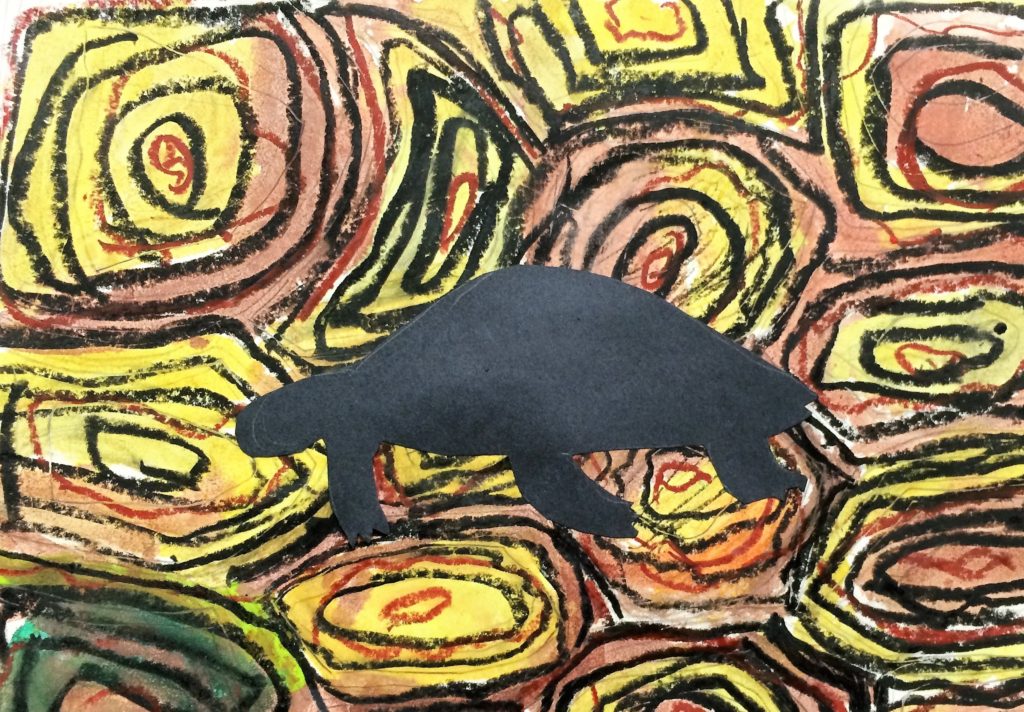
Here are some finished Animal Skin art pieces!


Common Core Standards
7th Grade – Science – Focus on Life Sciences
Structure and Function in Living Systems
5. The anatomy and physiology of plants and animals illustrate the complementary nature of structure and function. As a basis for understanding this concept:
a. Students know plants and animals have levels of organization for structure and function, including cells, tissues, organs, organ systems, and the whole organism.
Leave a Reply