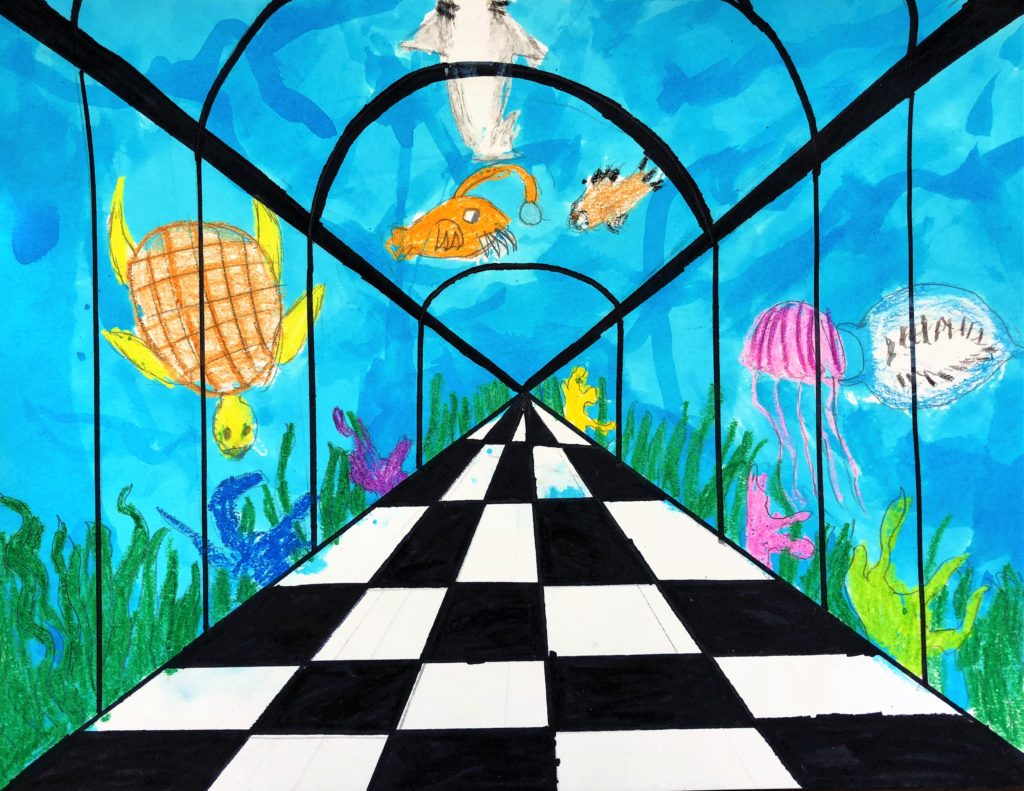
In this Aquarium Perspective Lesson, Middle School students will dive right into learning about the principle of perspective while designing an aquarium. This project covers Common Core Standards for Math and Science for grades 4-8 which can be found at the end of the lesson.
Grade Levels
4th, 5th, 6th, 7th, and 8th Grades – The examples shown were made by a 5th grade class.
Objective
In this Aquarium Perspective Lesson, students will demonstrate one-point perspective by creating artwork inspired by a walk-through aquarium.
Time
3 – 60 min lessons
Materials
- Pencils
- Rulers (yard stick and one foot)
- Crayons
- 9×12 Watercolor paper – Canson (100510941) XL Series Watercolor Pad, 9″ x 12″, Fold-Over Cover, 30 Sheets
- Brushes – Acrylic Paint Brush Set, 1 Packs / 10 pcs Nylon Hair Brushes for All Purpose Oil Watercolor Painting Artist Professional Kits
- Liquid Water Colors – Sargent Art 22-6061 8-Ounce Watercolor Magic, Turquoise
- Kleenex for blotting paint
- Black Sharpie Marker – SHARPIE Permanent Markers, Fine Point, Black, 2 Ct
Inspiration/Artist
I got the idea for this project from this site – Click Here
Instruction with Questions
Day 1
Watch videos and discuss concepts of how to create perspective for your Aquarium Perspective Lesson.
Brain Games: “What do you see?” – Click Here
Brain Games: “Perspective Cues, Linear Perspective, and Size Contrast” – Click Here
Ways to Create the Illusion of Space – Click Here
One Point Perspective – Click Here
Discuss with students:
- Which direction are the lines facing in all of the examples? (vertical, horizontal, perspective (diagonal))
- Horizontal, vertical, perspective, parallel vocabulary. Have students use their arms to show you which is which.
- Are they consistent? Do you see any lines that do not follow the rule of these lines? (pst…the answer is no)
I actually project a photo in one-point perspective onto the white board. Using a yard stick, I literally trace the lines onto the white board. When I turn off the projector, the students can see that the “science” behind this technique truly works. The horizontal lines remain horizontal. The vertical lines are exactly that. Even though our brain wants to make the vertical lines “lean,” they actually remain vertical.

Day 2
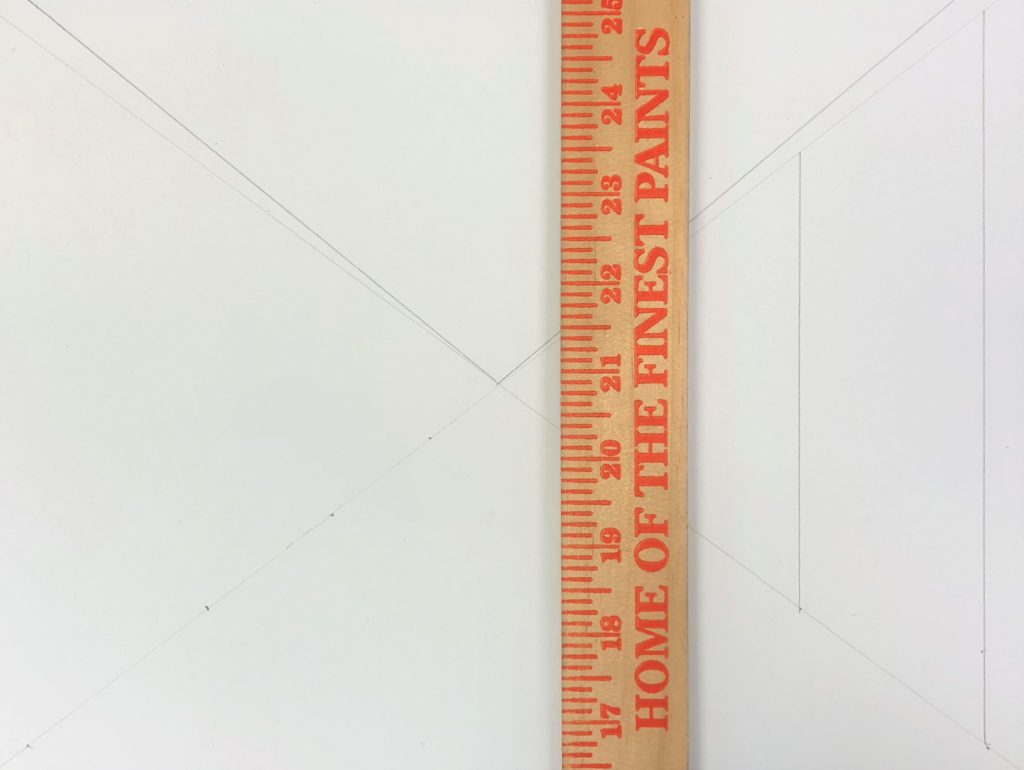
Students practice by following step by step teacher led directions. Main points: Lines are either parallel vertical, parallel horizontal, or they are on the perspective line. Students use 9×12 watercolor paper, and use their ruler to draw lines with pencil from each corner through the center of the paper (X). I recommend using a yard stick for this step.
#1
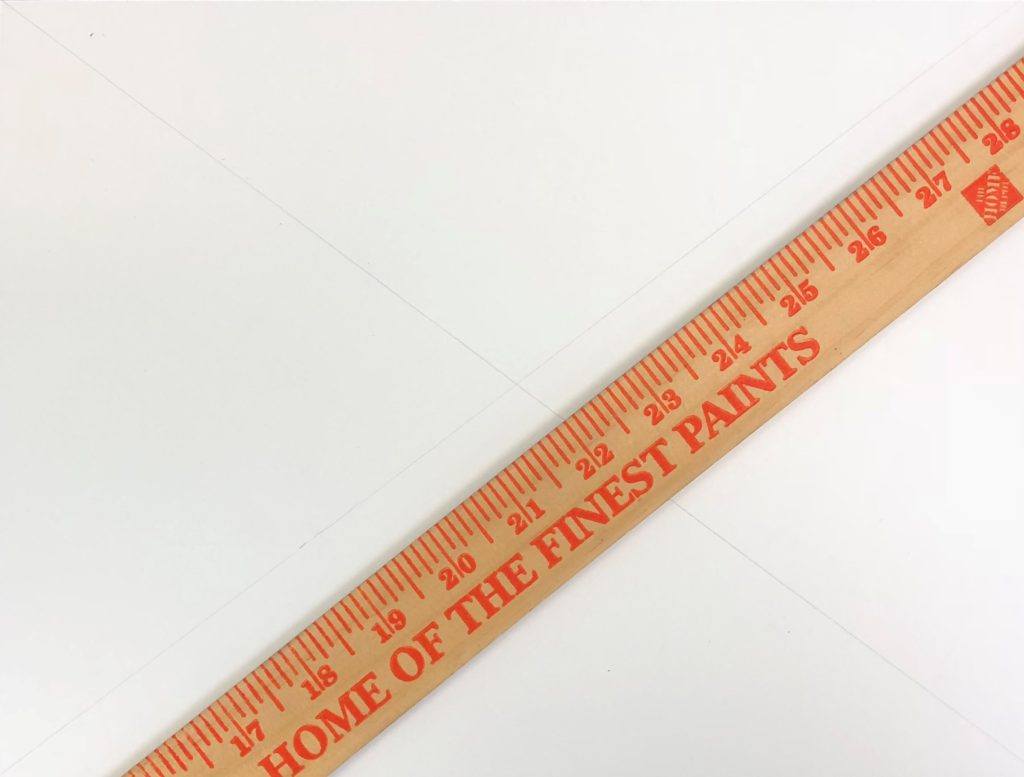
#2
Students make two more “perspective lines” from center to top, above corners, to create the ceiling lines.
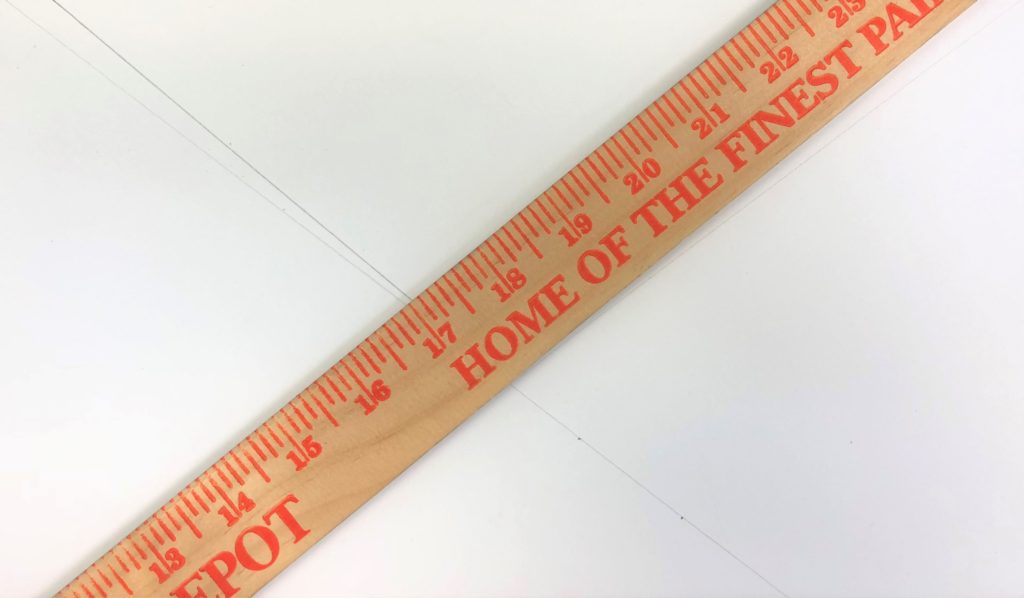
#3
Students mark dots along the perspective line by holding the ruler horizontally. Once the dots are measured, have them draw “up” parallel to the side of the page to create the vertical lines. This will maintain evenly distributed vertical lines. The vertical lines shown here happen next…
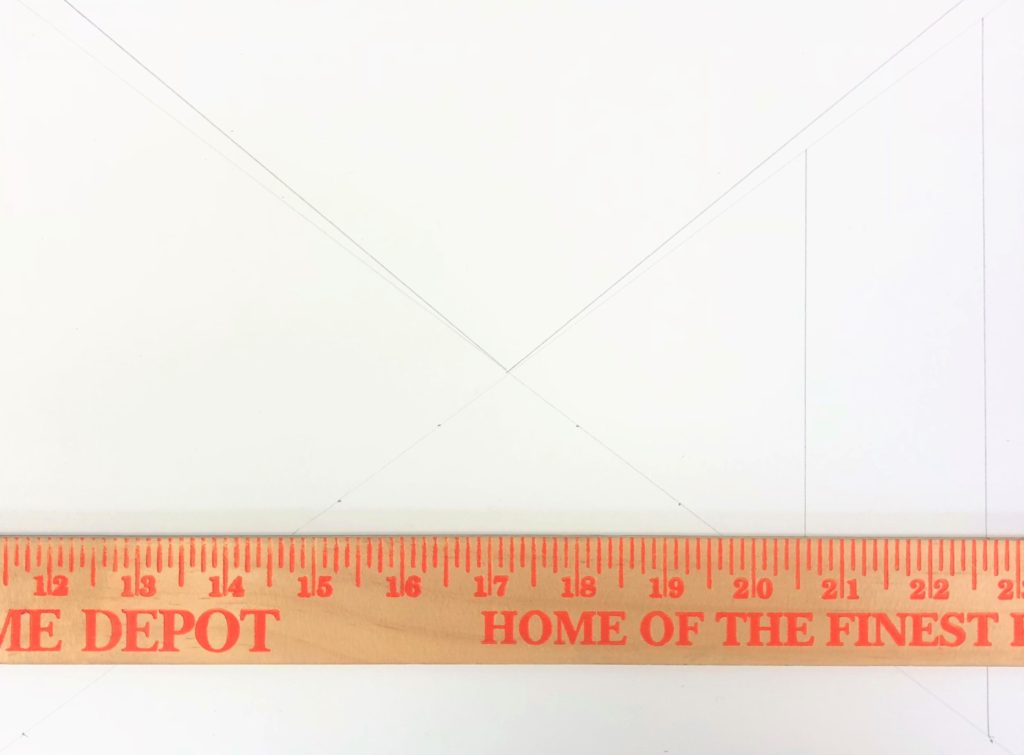
#4
Students create vertical lines equally spaced from center on left and right. I recommend 4-5 lines on each side.
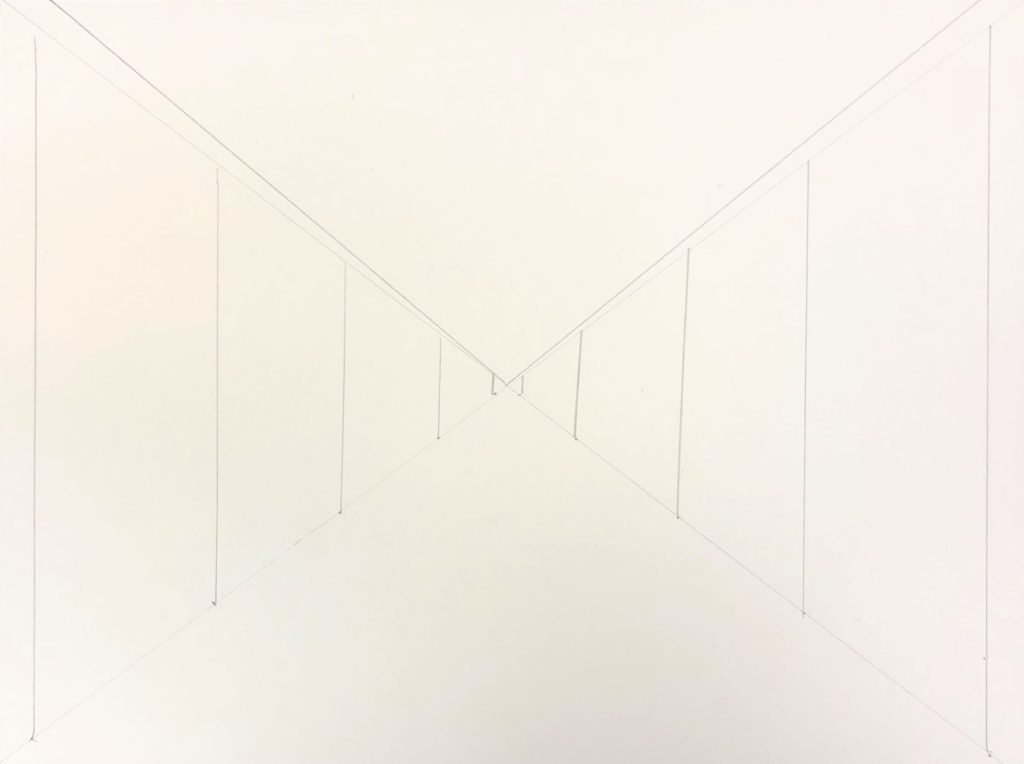
#5
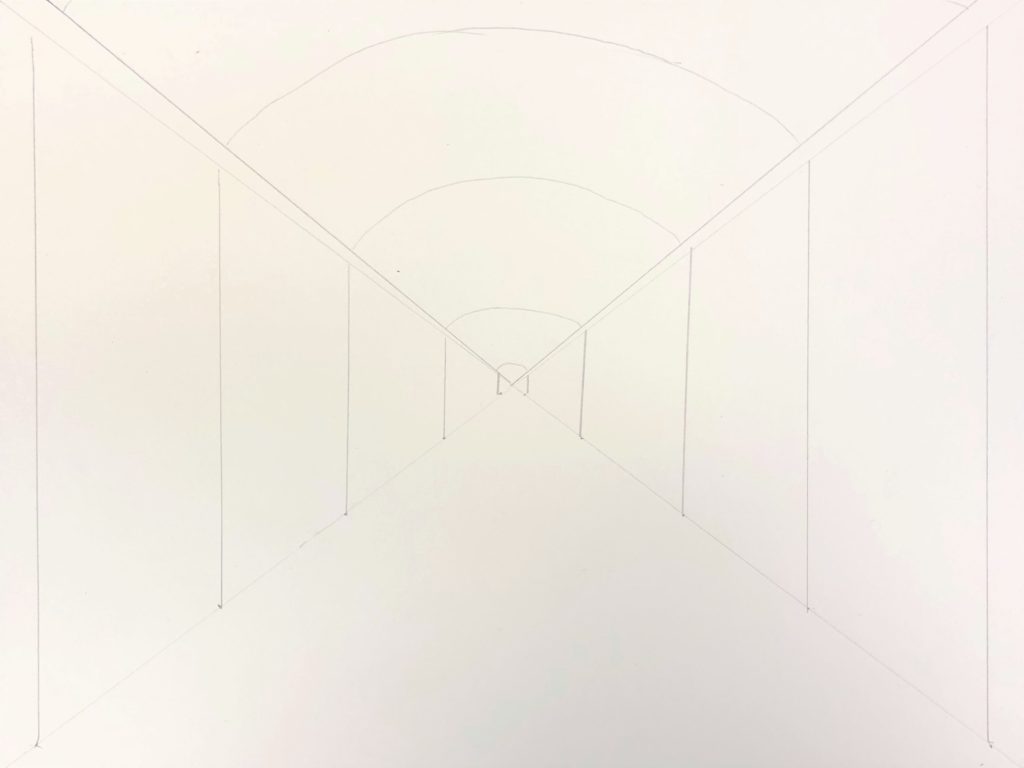
Students create rounded ceiling lines connected to the vertical lines through the top. Note: the top arc may not be completely visible. We have a discussion about images “going off the page.” Our brain finishes the image, adding to the illusion.
#6
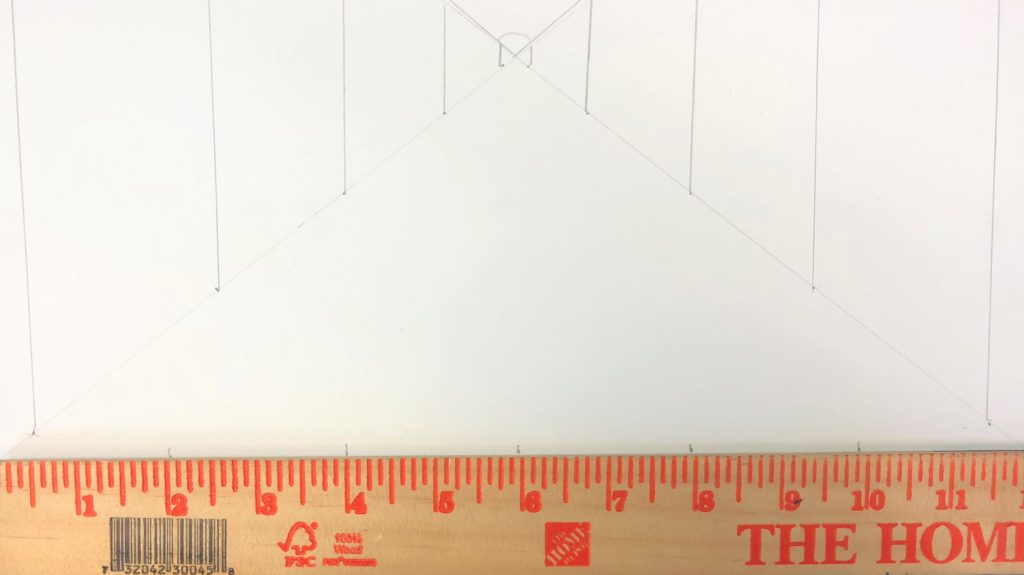
Students “prep” the bottom of the page for the “perspective lines.” Since this is a 9×12 paper, I have them mark off every 2 inches and make a dot across the bottom of the paper.
#7
Each dot is connected with the middle dot.
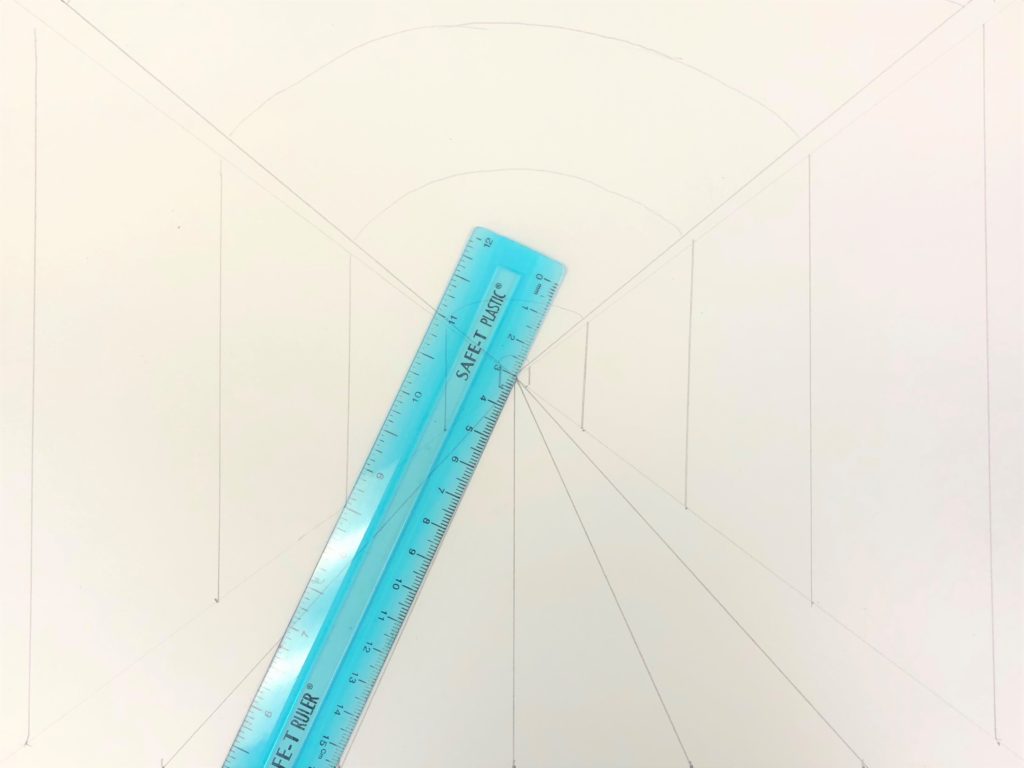
#8
Students use their ruler to create horizontal lines through the perspective lines. I recommend that the students place their horizontal line directly between the vertical lines, rather than making them random. This automatically creates a spatial distance that grows from wide to narrow as the lines go further into the distance.
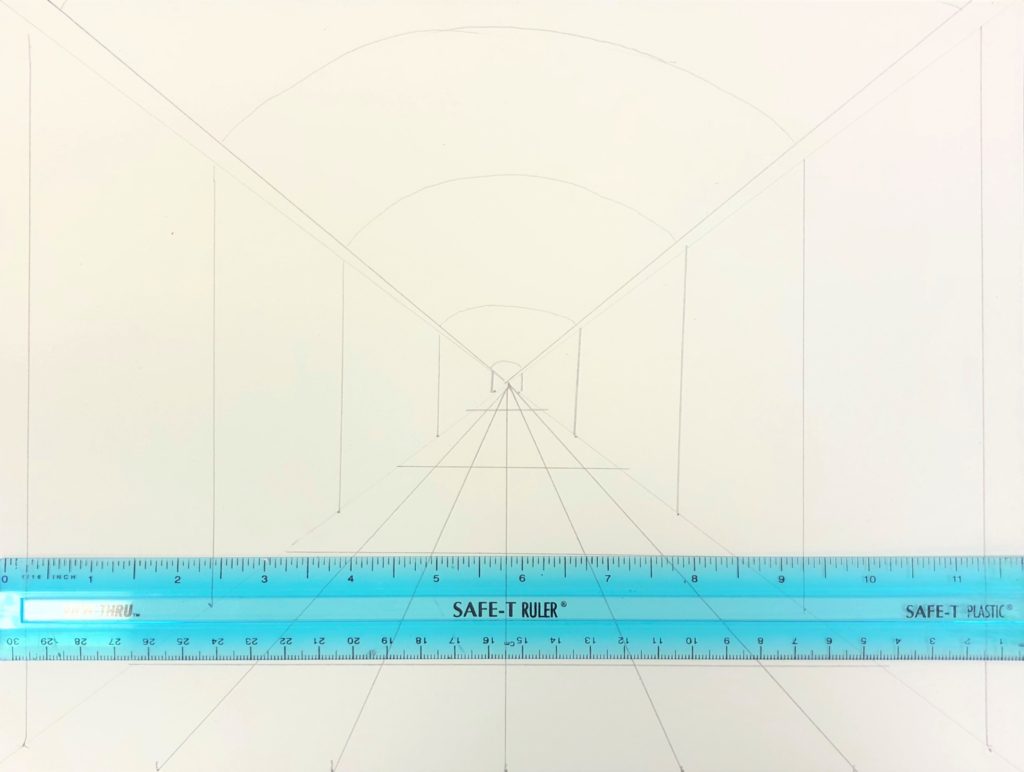
#9
Before students begin tracing the pencil lines with sharpie, I ask them to put a small dot in every other floor square to ensure they create the checkerboard successfully.
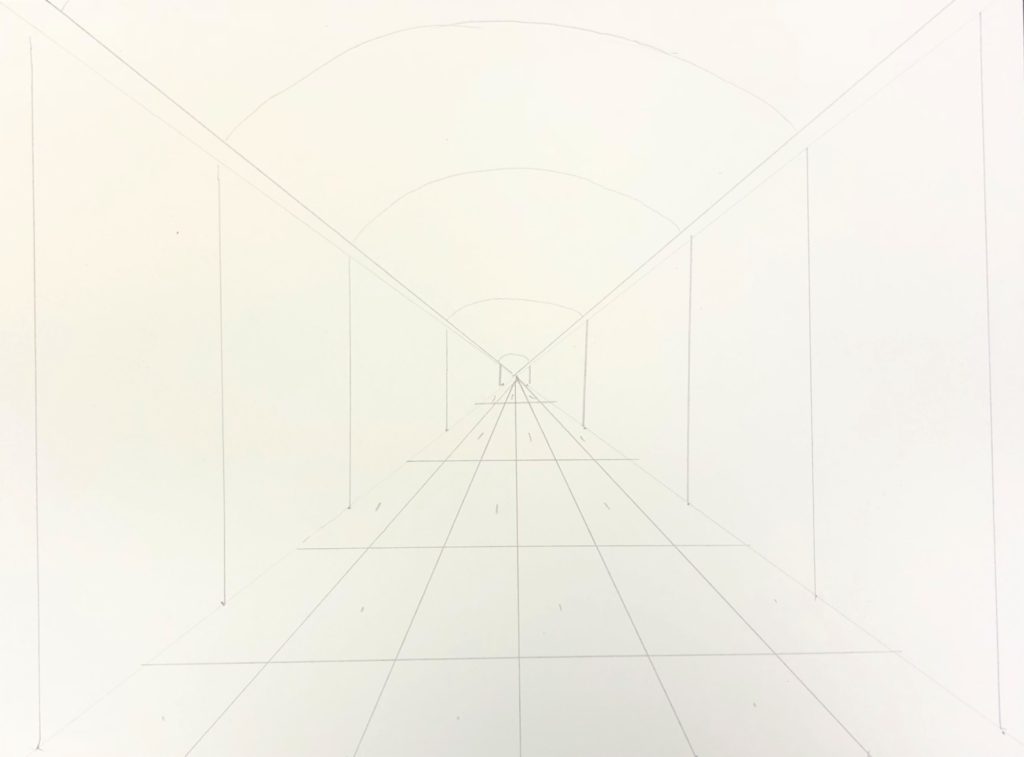
Day 3/4
The next steps vary on time per class. I wait until Day 3 to have any students even touch a sharpie. Sometimes some students need to fix some lines. Having a break at this point allows me to double check each child’s paper before they continue. If you feel like they can move onto sharpie, by all means go for it.
All lines are traced over with sharpie. The lines along the walls and ceiling are thickened. The floor is also colored in with sharpie.
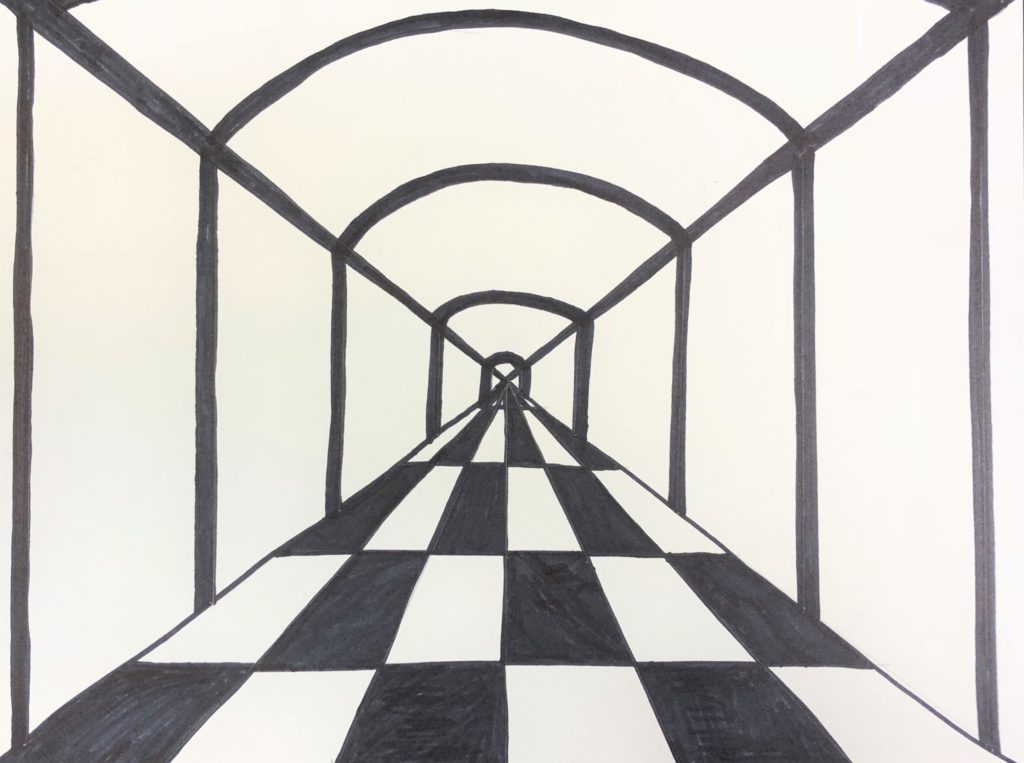
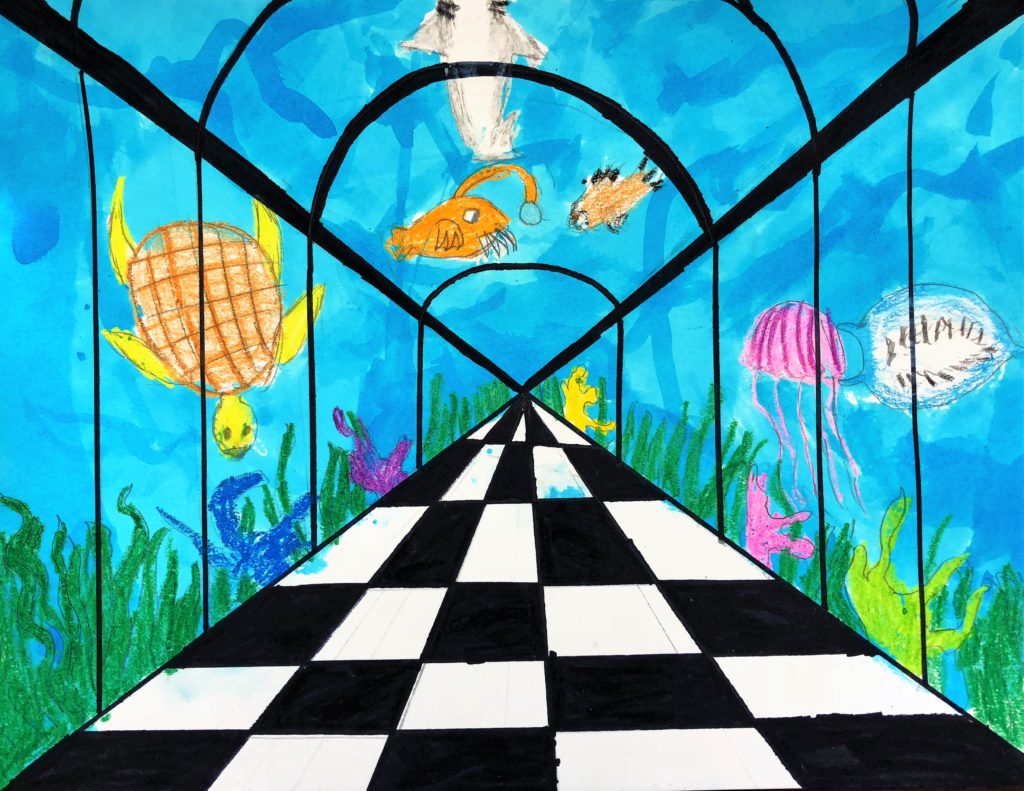
Students draw creatures in the aquarium. Fish are made with pencil, sharpie, and crayon or oil pastel. This will create the technique of “resist.” The crayon/oil pastel will show through the watercolor when painted over. Because of this, students are reminded to fill in their creatures completely and not leave fish outlines. Notice the shark in the image below. Remind them how important it is to use the magic of white crayons and oil pastels. The watercolor paint skips right over the crayon/pastel, leaving a strong white color if desired. I have my own rule that this is a happy aquarium and no fish are angry or eating other fish hahaha.
As students finish their sharpie, I invite them to a “painting table” where they can watercolor the background turquoise.
Students complete their work and add their name in sharpie to the bottom of the page.
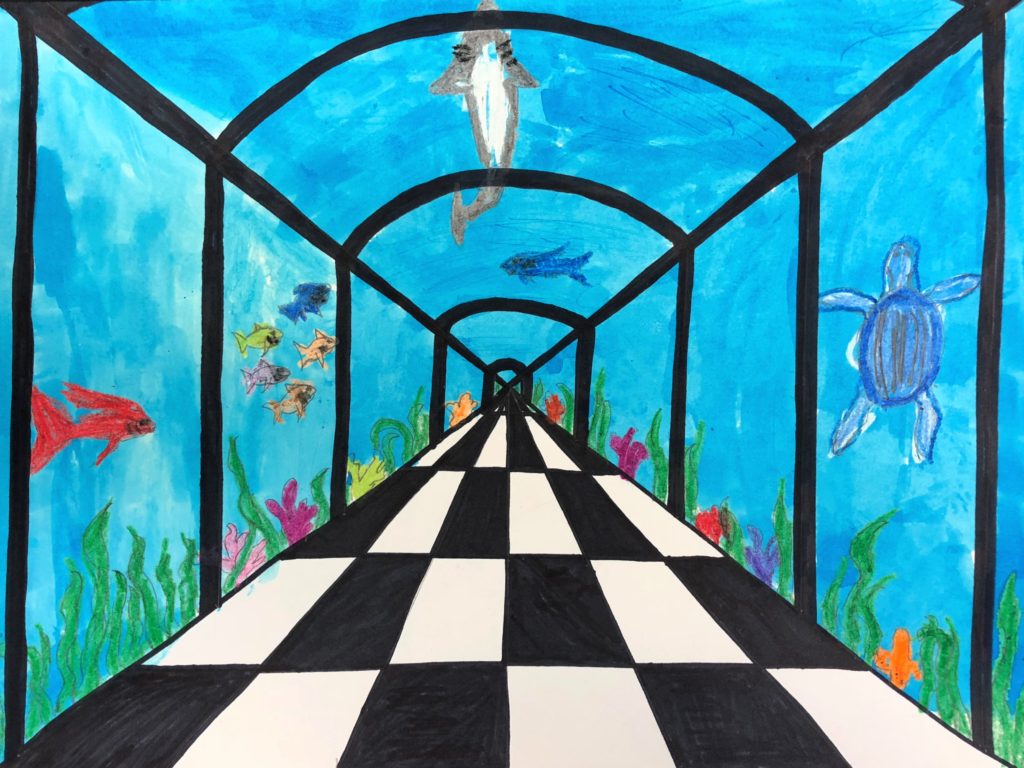
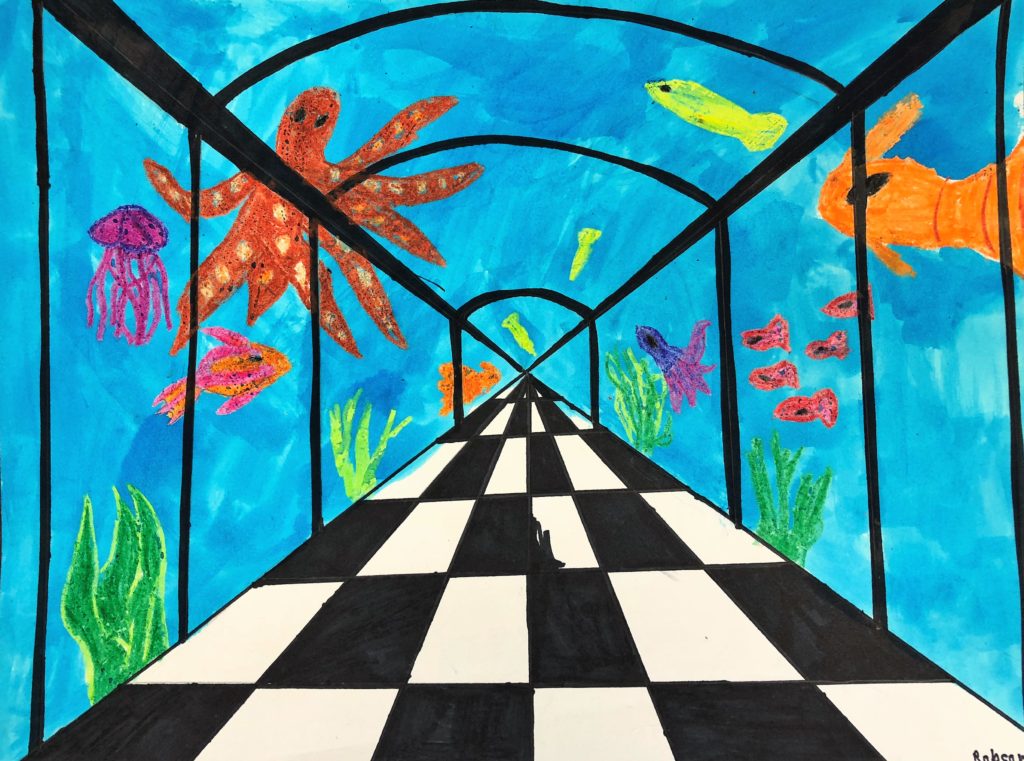
I love how the white checkered floor stands out!
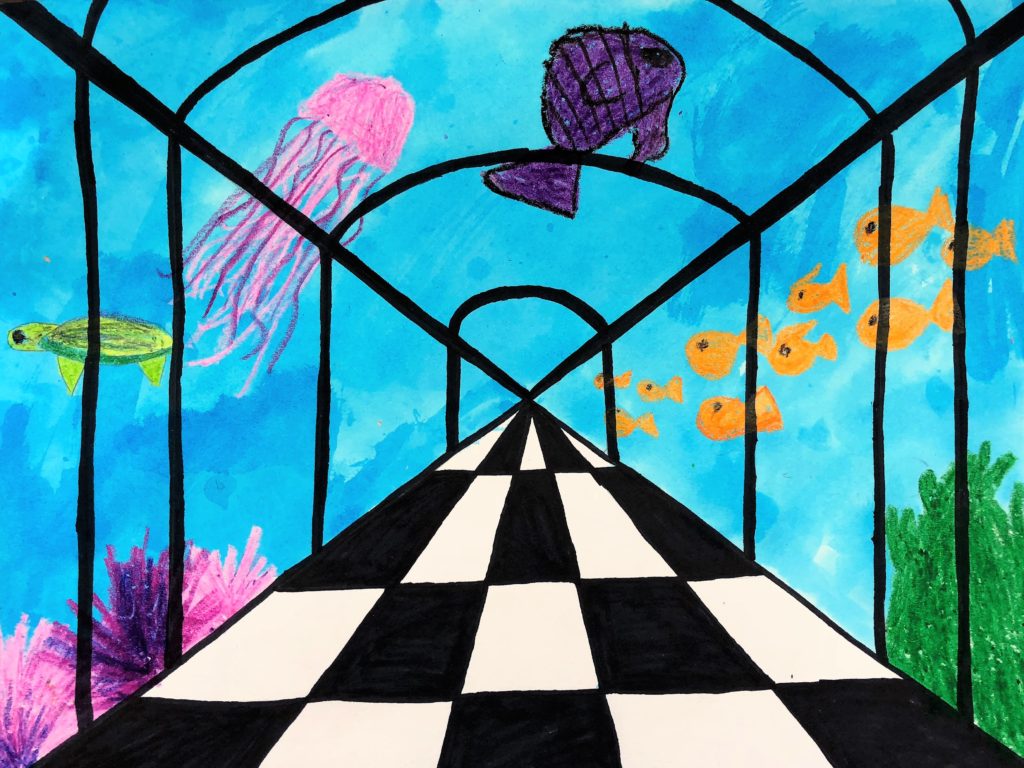
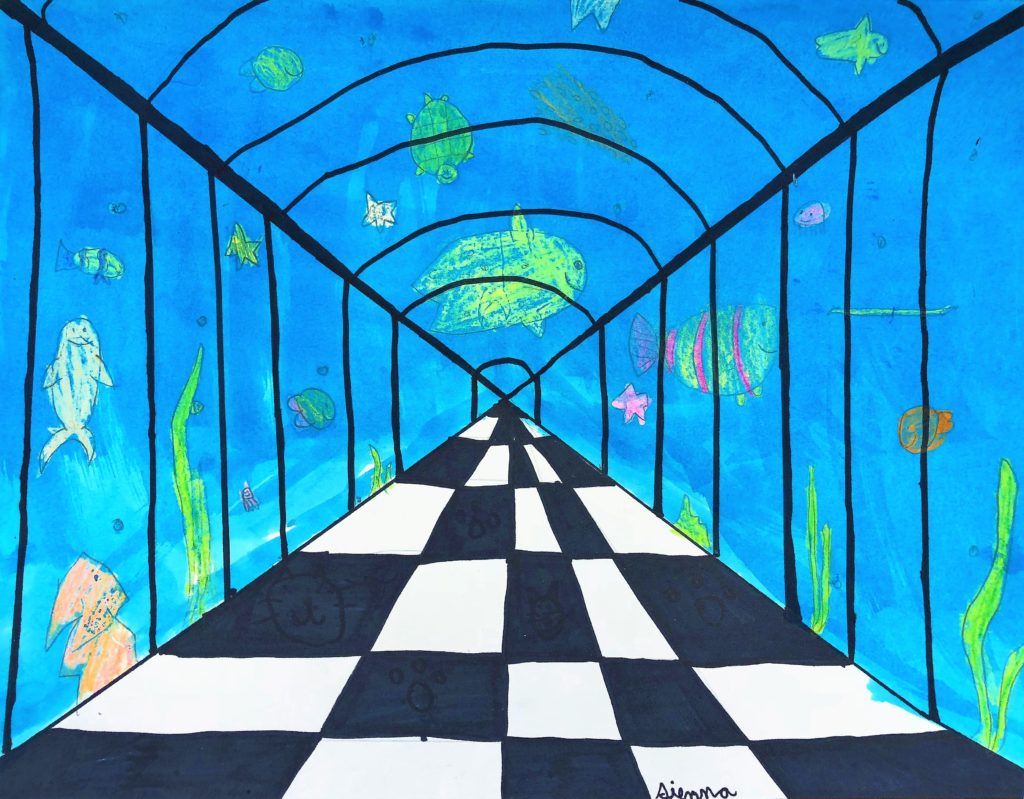
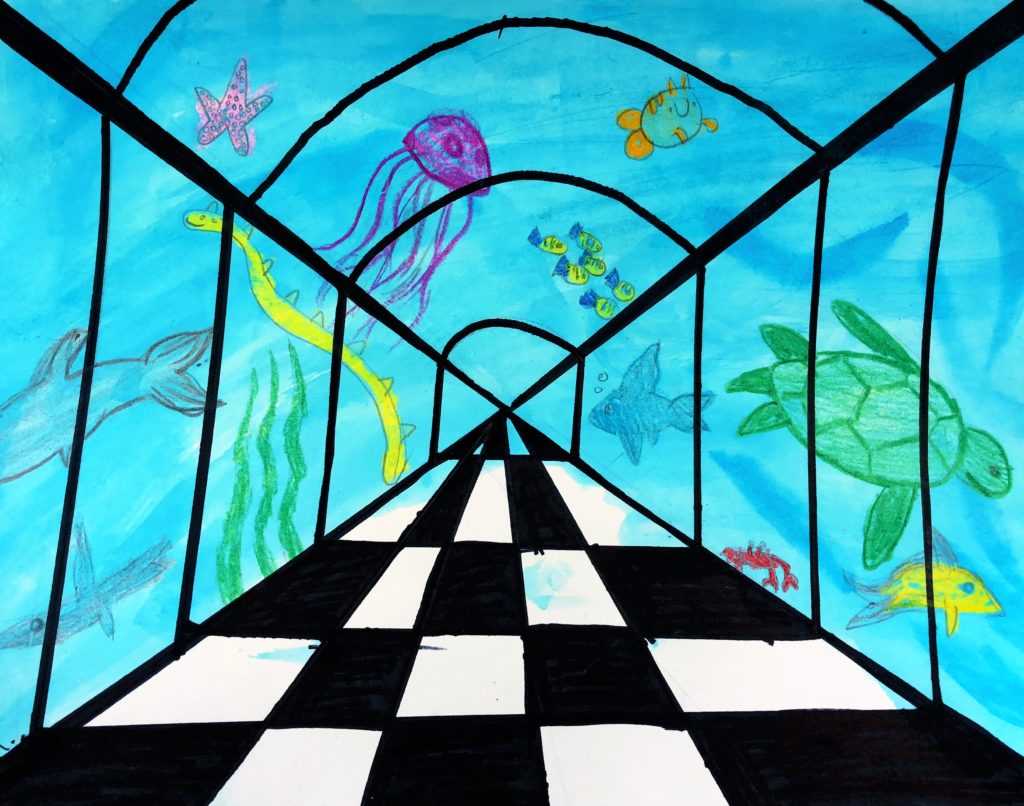
Here are some finished Aquarium Perspective Lesson pieces!
Common Core Standards
4th Grade – Math – Geometry
Draw and identify lines and angles, and classify shapes by properties of their lines and angles.
- Draw points, lines, line segments, rays, angles (right, acute, obtuse), and perpendicular and parallel lines. Identify these in two-dimensional figures.
5th Grade – Math – Geometry
Graph points on the coordinate plane to solve real-world and mathematical problems. (1-2)
6th – Science – Ecology (Life Sciences)
- Organisms in ecosystems exchange energy and nutrients among themselves and with the environment.
- Students know populations of organisms can be categorized by the functions they serve in an ecosystem.
- Students know different kinds of organisms may play similar ecological roles in similar biomes.
6th Grade – Math – The Number System
Apply and extend previous understandings of numbers to the system of rational numbers.
6. Understand a rational number as a point on the number line. Extend number line diagrams and coordinate axes familiar from previous grades to represent points on the line and in the plane with negative number coordinates.
b. Understand signs of numbers in ordered pairs as indicating locations in quadrants of the coordinate plane; recognize that when two ordered pairs differ only by signs, the locations of the points are related by reflections across one or both axes.
6th Grade – Math – Geometry
Solve real-world and mathematical problems involving area, surface area, and volume. (1-4)
7th Grade – Math – Geometry
Draw, construct, and describe geometrical figures and describe the relationships between them. (1-2)
Solve real-life and mathematical problems involving angle measure, area, surface area, and volume. (5)
8th Grade – Math – Geometry
Understand congruence and similarity using physical models, transparencies, or geometry software. (1-4)

Thank you for sharing this great lesson!
In the past, the black Sharpie has “bled” and smudged when students painted over them with watercolour.
Is there any way to prevent this?
Thank you so much for reaching out. I am curious about which type of paper you are using. This may make a difference in the ability of the paper to be able to hold the sharpie line. Let me know if this helps.
This lesson is wonderfully crafted. I appreciate the thoroughness of the presentation and how accessible the lesson is. All the video links are on point: informative, concise and interesting. The steps for the drawing are clearly illustrated and explained. This is an open and go lesson that does not need to be previewed. It just works so well. I’m homeschooling one middle schooler but i can see how this would easily be presented to a whole class. Thank you so much.
Wow! Thank you so much for this awesome feedback! Let me know how else I can support you. Thank you for extending art in your homeschool program.
We completed the art lesson on perspective today. The pieces turned out really well! Slide 23.
Awesome! So glad to hear it!
I’m doing this in my art classes this week! Thanks for the thorough instructions and embedded videos. I know my elementary students are going to love this:)
Awesome! Let me know how it goes!
Hi ! Thank you so much for this tutorial. I cannot wait to do this with my homeschool art group. Do you have a PDF version of the directions (even for purchase would be fine!) so that I can reference next to me on the table (or for those that might need the differentiated instructions next to them?). Thank you! -Lindsi
Thank you so much for reaching out. This is a great idea. I do not currently have a PDF for this lesson. I am not sure what technology you have available. Sometimes I have projected the lesson onto a whiteboard and drawn right on top of the lines with a variety of colored expo markers. Or had my phone with the directions at my side as I do one in front of them. I will work toward creating PDFs for future lessons. I hope your group has fun. I would love for you to email me some finished pieces. Let me know how else I can support you. leahnewtonart@gmail.com
I love this! When you draw and color in the creatures with oil pastel/crayon, don’t they cover the sharpie?
Great question! The animals and seaweed will only be the oil pastel and crayon. The sharpie will just be the windows and flooring. Even if students decide to outline their creatures with sharpie, it will only mildly cover it when they use their crayons. I hope that was helpful.
yes
So cool!!!!!!!!!! It was fun!!!!!!!!!
Thanks! I am so glad!
SO COOL!!!
Thanks!
SOOOOOOOOOOOOOOOOOOO COOOOOOOOOOOOOOOLLLLLLLL
Super fun + cool!!!
So inspiring and fun!