Middle School students explore the mindfulness of Zentangle, the benchmarks for math, and the elements of line and texture in this Zentangle Reflections art lesson. This project covers Common Core Standards for Math for grade 6 which can be found at the end of the lesson.

Grade Level
6th, 7th, 8th Grade – The examples in this lesson are made by 7th graders.
Objective
In this Zentangle Reflections Art Lesson, students will design a Zentangle drawing creating positive and negative space using the silhouette of an animal or leaf.
Time
2 60 min lessons
Materials
- Ultra Fine Sharpie Marker – Sharpie 37101PP Permanent Marker, Ultra Fine Point, Black, 1 Count
- Black Construction Paper – SunWorks Heavyweight Construction Paper, 9 x 12 Inches, Black, 100 Sheets
- White Construction Paper – SunWorks Heavyweight Construction Paper, 9 x 12 Inches, White, 100 Sheets
- Scissors
- Glue Stick – Elmer’s Glue Stick (E4062) (7 sticks)
Inspiration/Artist
I was inspired to create this lesson from this site
Instruction with Questions
Pre-Art
I used animals or leaves for this project to showcase items in Autumn. You could use just about any shape. Choose some shapes which students will choose.
I have done this lesson using sharks, unicorn heads, converse shoes, butterflies, and a t-rex. I like to think about what middle school students may be interested in and go from there. The sky is the limit! Students will choose from these images to create their mirror image.
Day 1
Today, students will review what they know about Line, Texture, and Patterns.
#1
Ask students what they already may know about zentangle. Do they doodle? Why? When? Where? How?
Next, define Line, texture, and pattern in a more formal way:
Zentangle:
The following ideas were found on psychologytoday.com.
- Zentangle® is known to many artists and craftivistas as a way to create structured designs through drawing various patterns.
- (It) has become an international phenomenon that now has applications in stress reduction, education, therapy and even motivational training.
- The basic principles involved are as old as the history of art. It includes ritual [a core practice in ancient and contemporary arts] and mirrors the symbols, designs and patterns of numerous cultures [Mayan, Maori, Celtic, and American Indian, for example]
- It’s Self-Soothing
- It’s Simple
- It Teaches How to Own Mistakes
- It Reinforces “Aimlessness.” – Stay in the creative process and moment
Line: A line is an identifiable path created by a point moving in space. It is one-dimensional and can vary in width, direction, and length. Lines often define the edges of a form. Lines can be horizontal, vertical, or diagonal, straight or curved, thick or thin.
Texture: Texture refers to the way an object feels to the touch or looks as it may feel if it were touched.
Pattern: Repetition refers to one object or shape repeated; pattern is a combination of elements or shapes repeated in a recurring and regular arrangement.
Negative and Positive Space
An important component of this lesson is the use of positive and negative space. Here is a great video to help explore and teach this concept. The main difference between negative and positive space depends on the area of interest. For this lesson, I refer to the Zentangle areas as positive space.
#2
Next, hand out a worksheet with a variety of these. There are many worksheets you can use just by googling Zentangle. Here is a great one from www.instructables.com. I print out a copy of this for the students for reference.
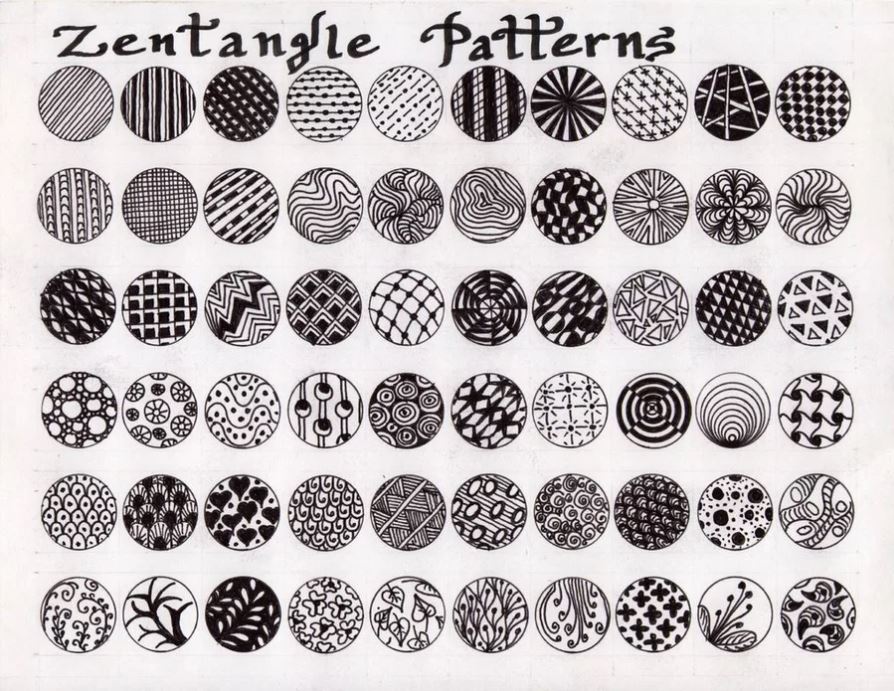
#3
Give students the worksheet, a half sheet of white construction paper, and a fine tip Sharpie Marker. No pencils. Gasp!
Instruct them to create 6-8 “areas” that are random by drawing lines from one side of the paper to the other.
Show students that each area will hold one Zentangle pattern. Using sharpie only, ask them to begin by choosing one area and add a zentangle pattern which they will create and repeat. Remind students about the effective approach of allowing a pattern to “go off of the page”.
#4
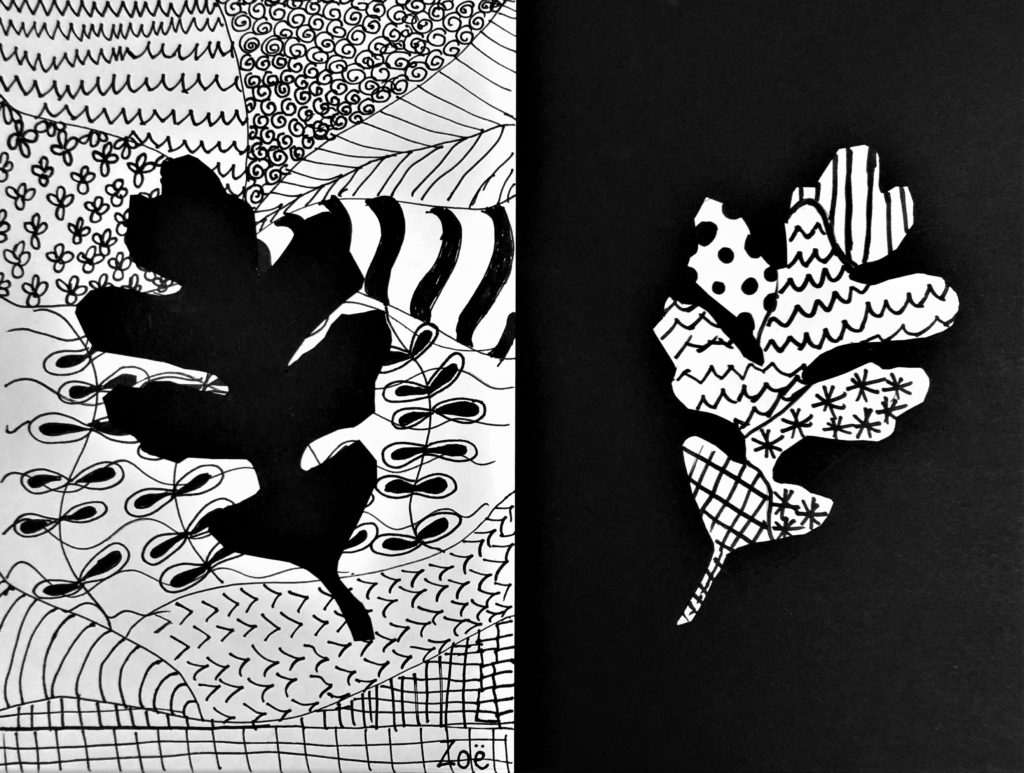
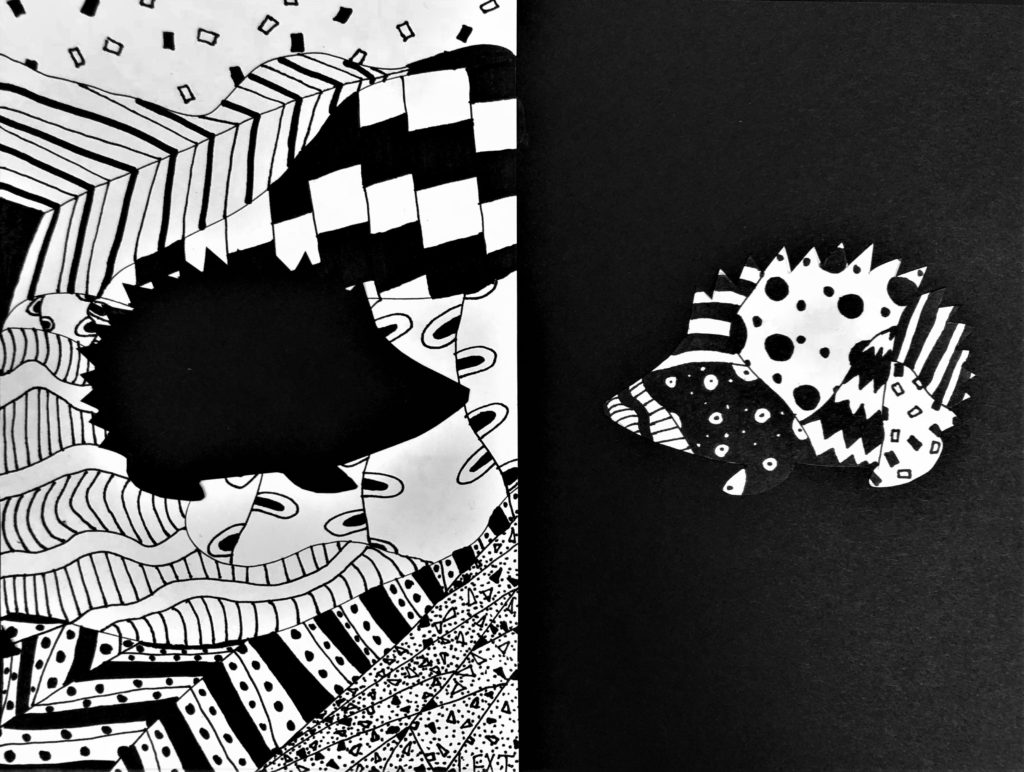
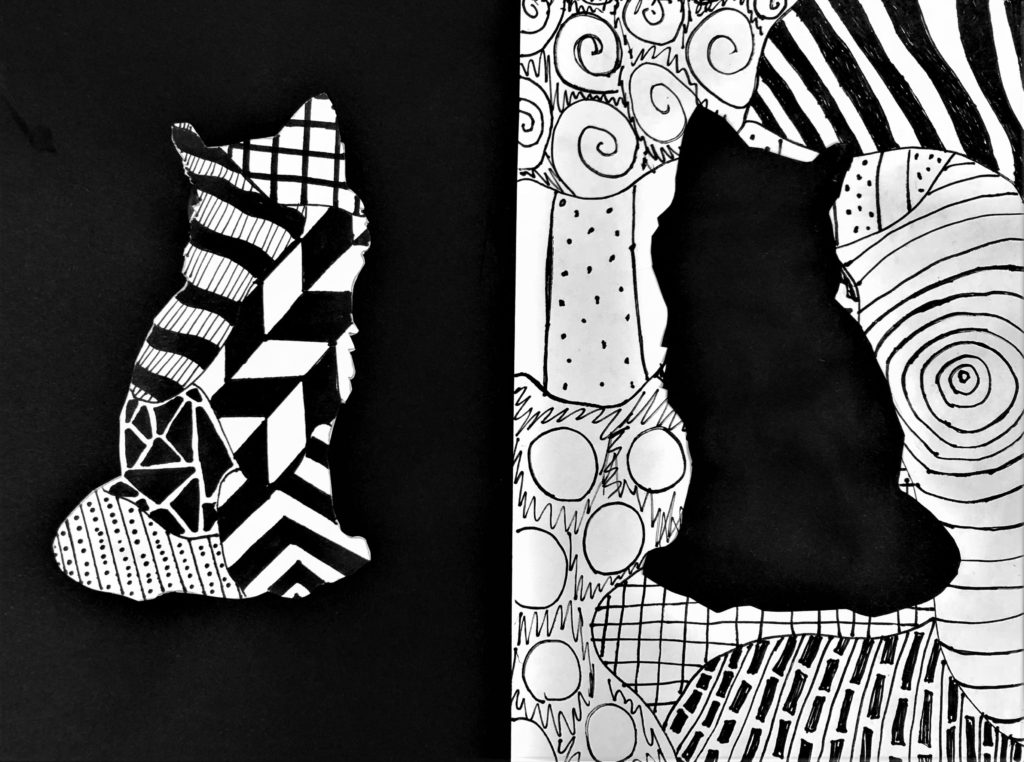
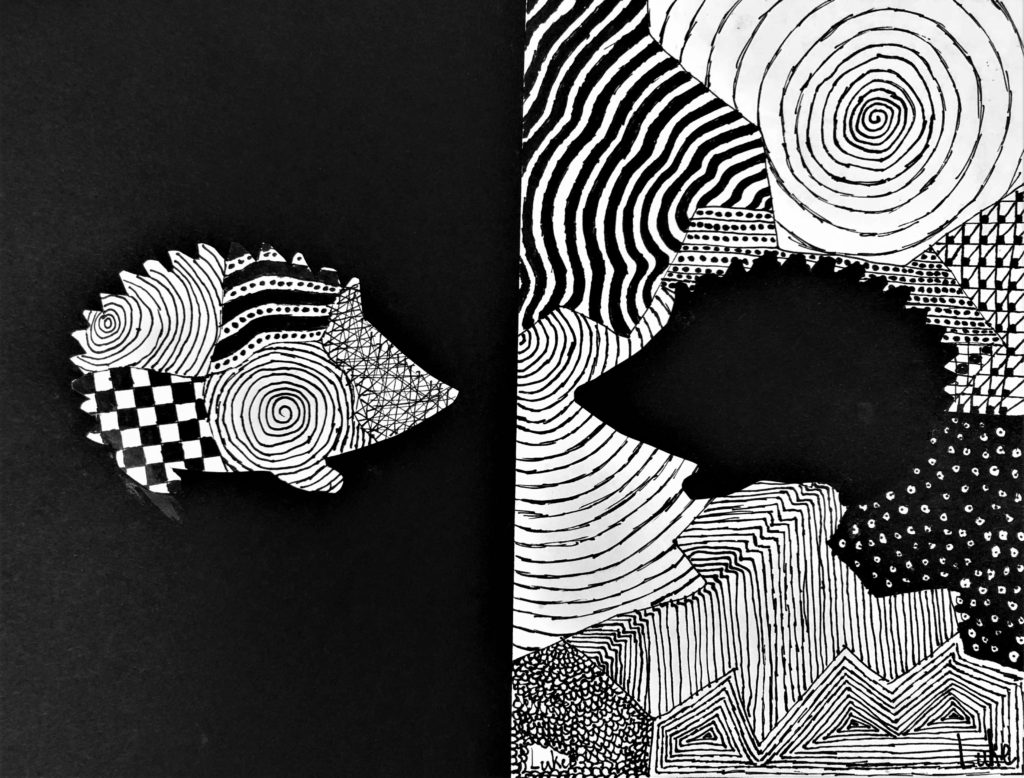
Call a few students aside at a time. Have them choose from a selection of shapes. (I chose animals and a leaf to represent autumn) In a window, have them trace around the silhouette of the shape onto a new white paper.
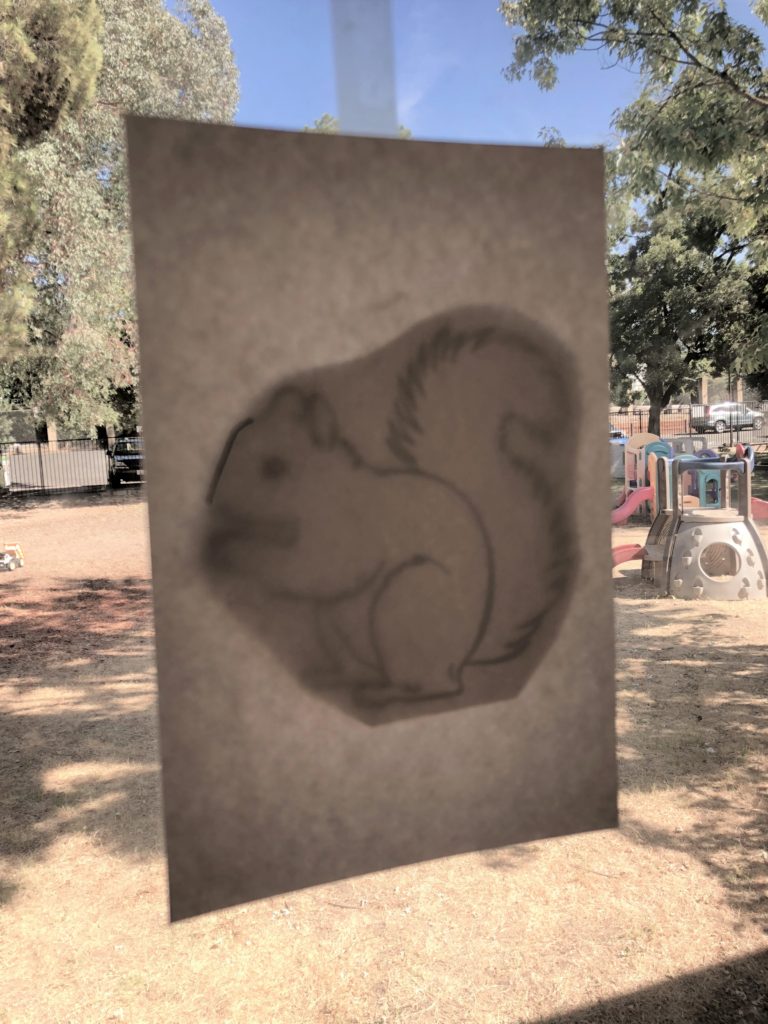
Students cut out the shape from the white paper, trace it onto a half-sheet of black construction paper, and cut out.
Day 2
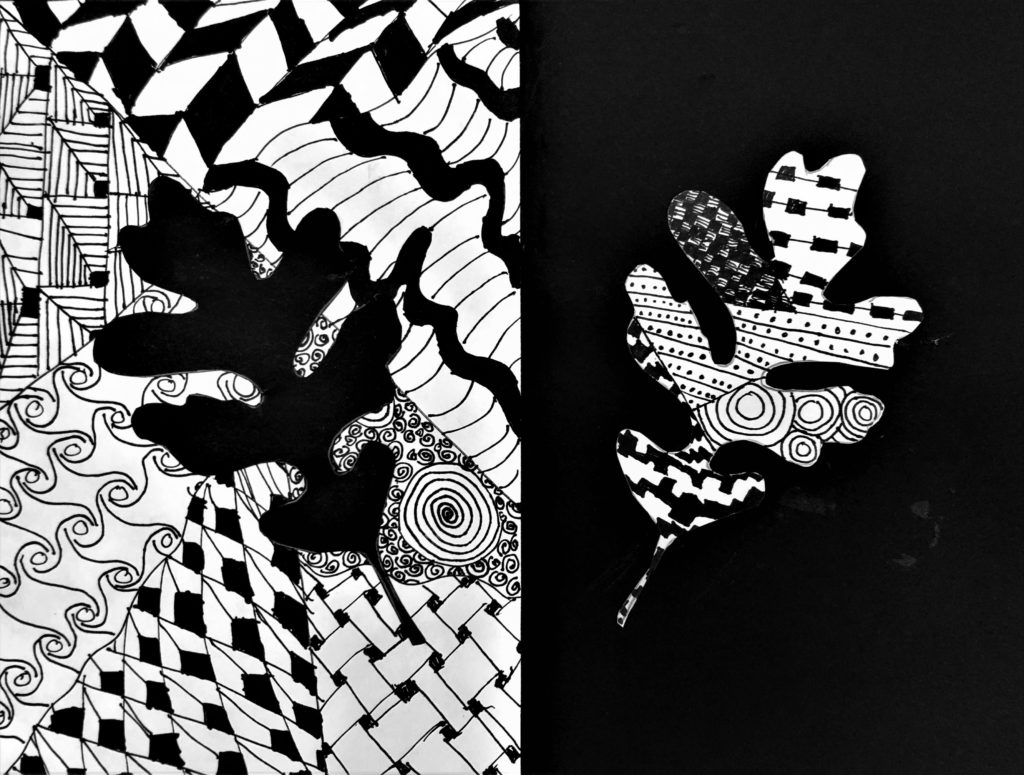
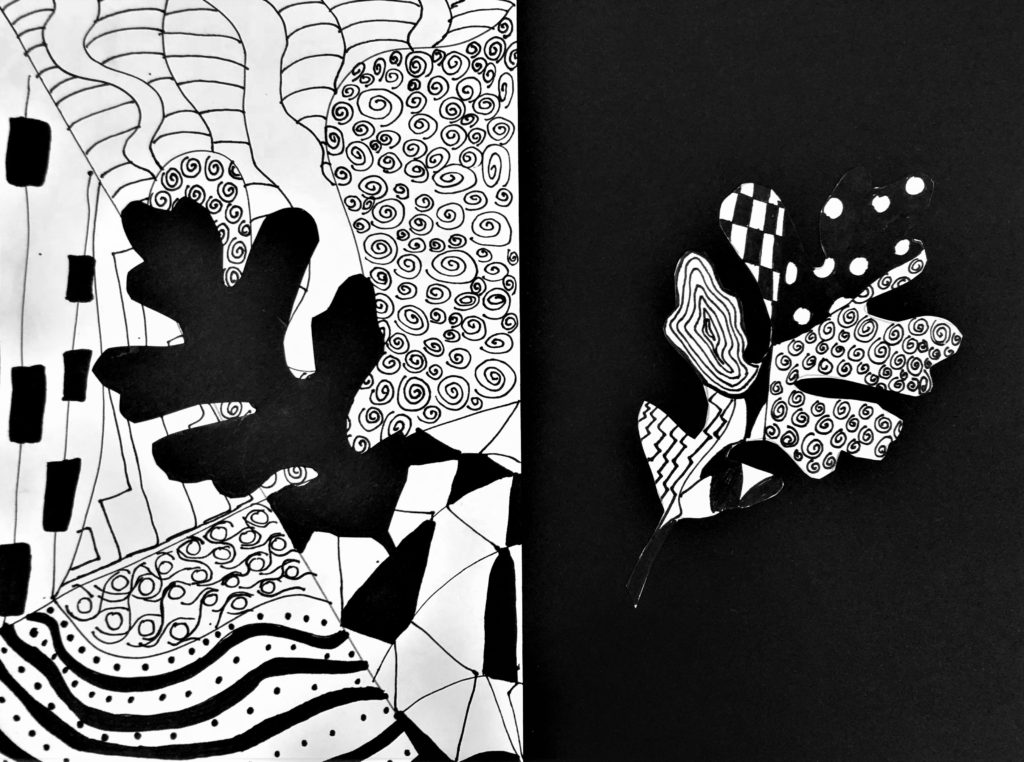
Of the white paper, half of it will fully contain a Zentange drawing. The other half will have a cut out of an image that will also be Zentangled and glued onto the black paper.
Of the black paper, half of it will fully be blank. The other half will have a cut out of an image that will be glued onto the Zentagled half of white paper.
Fill in half-sheet of white paper with a Zentangle pattern drawing. Students use the white cut-out shape from day one and draw Zentangle patterns on it. The Zentangle does not need to match the half sheet paper Zentangle. Students can create a new set of patterns and lines. There is a white half sheet with patterns and a separate cut out form like an owl, that has patterns on it as well.
Give the students a 9×12 size black piece of construction paper. This is the base.
It really depends on which side of their animal they drew their Zentangle. Ask them to experiment to see what makes the most sense.
Glue the half sheet to the black paper. Students glue the Zentangle form to black side and the black form to the Zentangle side.
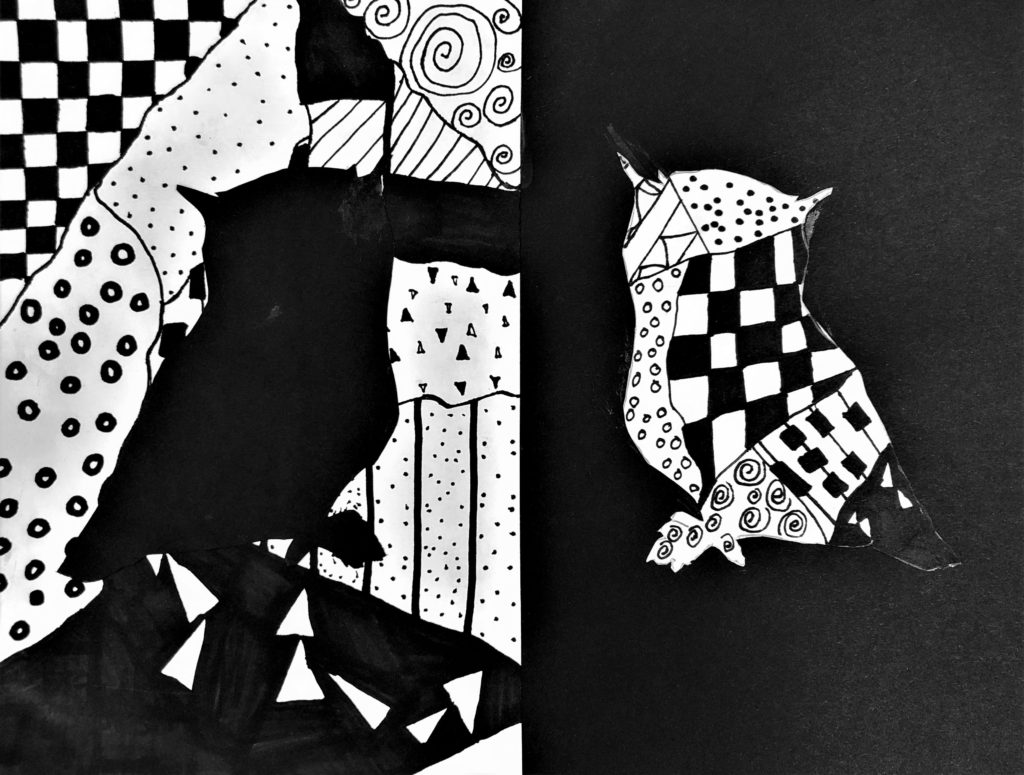
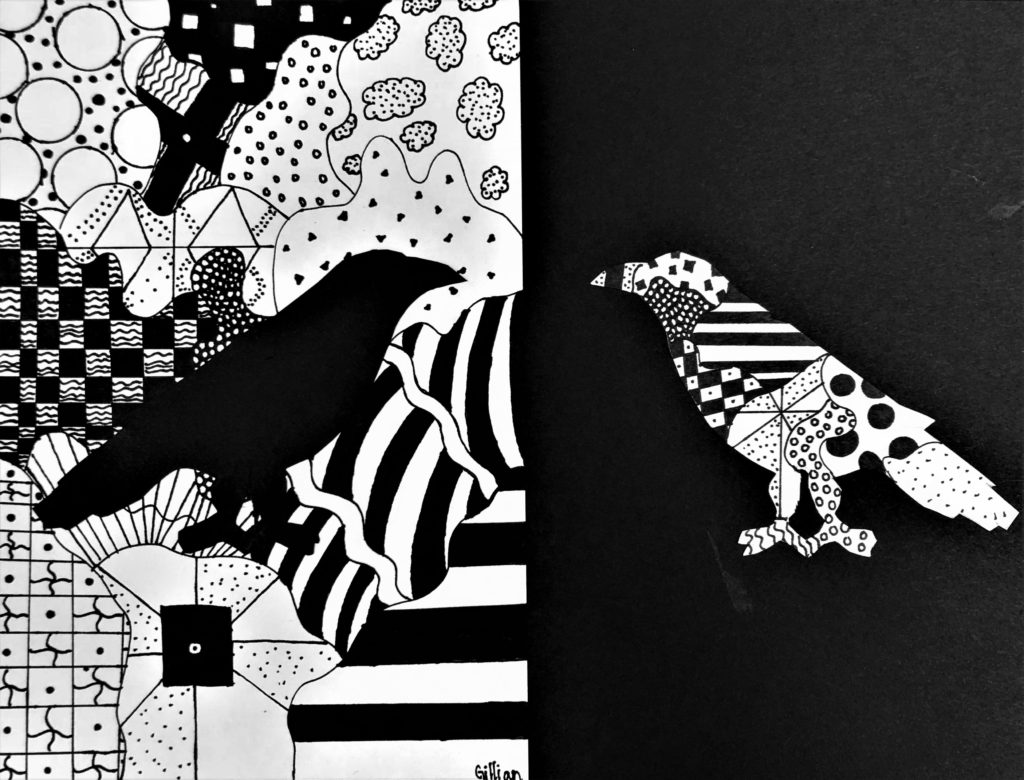
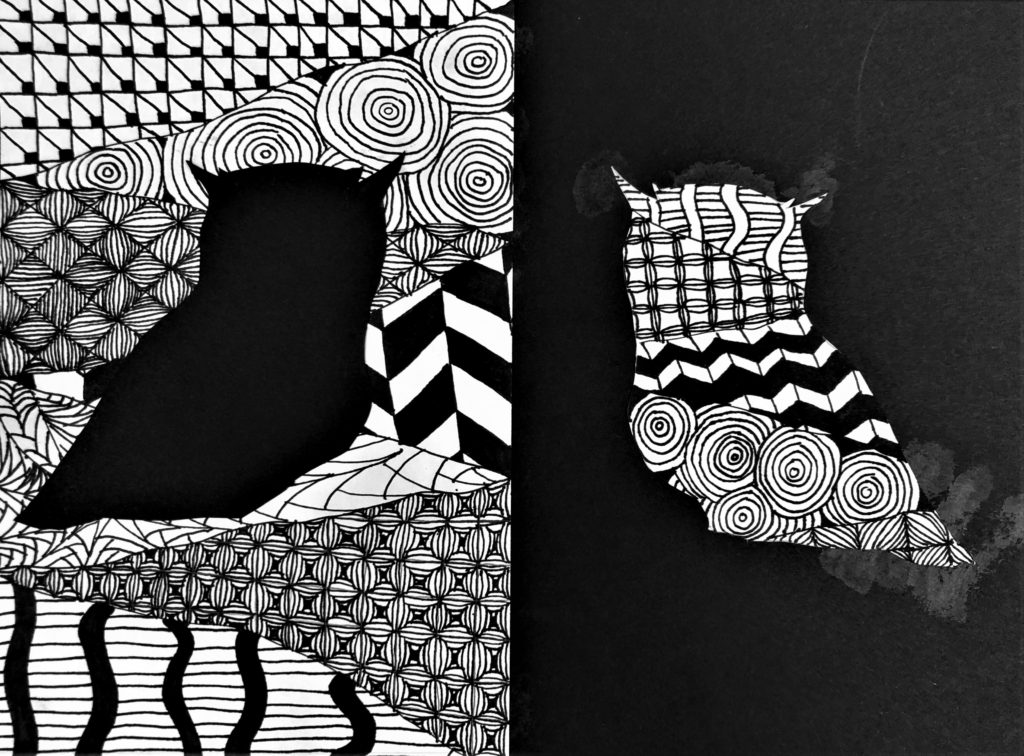
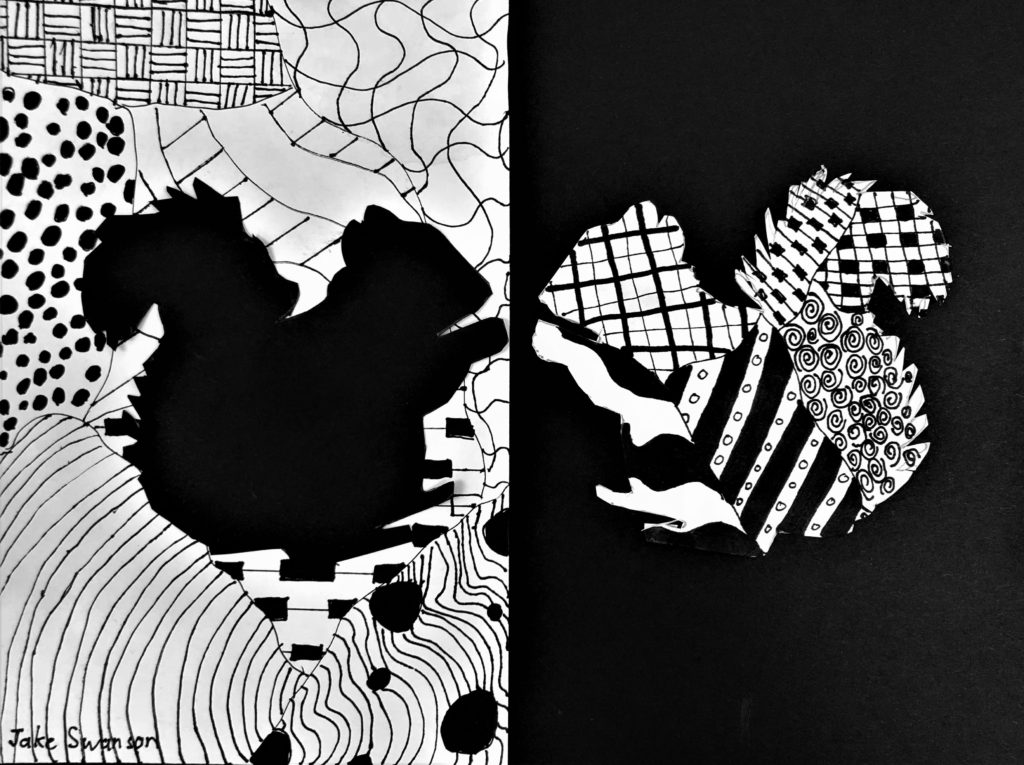
Check out these finished Zentangle Reflections Art Lesson pieces!


Common Core Standards
6th Grade – Math – The Number System
Apply and extend previous understandings of numbers to the system of rational numbers.
6. Understand a rational number as a point on the number line. Extend number line diagrams and coordinate axes, familiar from previous grades, to represent points on the line and in the plane with negative number coordinates.
Hi, I love this project and want to do it with my students. However, the instructions are not exactly clear to me, specifically Day 2 the second half of the first sentence.
I made updates to “Day 2.” I appreciate you reaching out for clarification. Please check it out and read all of day two and see if it makes sense now. Please feel free to reach out again if it is still unclear.
Thank you very much! The instructions are easier to understand. We did the project with 7th-10th graders with amazing results. Excellent project! I can’t wait to do it again.
I really appreciate this feedback. Thank you for supporting the arts!
Hello! I am currently filling the position of a long term art substitute, but as someone who has no art background, it tends to be a bit difficult at times. I love this concept and am trying to incorporate it into a positive/negative space lesson. However, I am totally not understanding the full concept. I read that positive space is the “subject” of the piece and negative is everything around it. In that sense, I can see the squirrel being the positive space in both “halves”. However, when I look at the definition being that positive is the area of interest and negative space is the empty space, I am totally lost. In that sense, I see the Zentangled squirrel and the Zentangled background both as the positive spaces. Do you have any clarifications or ways that I can better understand this concept? Thank you so much!
I am so glad that you reached out! This can be a tricky concept. The main difference between negative and positive space depends on the area of interest. They actually work together. The attached video at the end of this message explains it best. For this project, I believe they work equally. When I teach it, I refer to the Zentangle areas as the positive space. I hope this helps. Please feel free direct message me for further support in your substitute position. I work with professional development with teachers, too. leahnewtonart@gmail.com https://www.youtube.com/watch?v=q3Wx8vDsXuI
Thank you for sharing! 🙂
Awesome! Glad you liked it. Let me know if you need further support.
Not a teacher or even a parent of littles, just a grown woman who no longer feels connected to her art using your page to get back to the basics and see if I can rediscover what I used to love about creation. The fact you have this here, free, for me to use might genuinely change my life for the better. ❤️
This made my whole day. I truly hope that you continue to make art everyday. Please feel free to direct message me anytime. I am in California and would love to support you in your journey.